![]() Passend zu diesem Thema enthält das Thema Moodle eine Auswahl interessanter Seiten.
Passend zu diesem Thema enthält das Thema Moodle eine Auswahl interessanter Seiten.
![]() Passend zu diesem Thema enthält das Thema Aktivitäten und Materialien eine Auswahl interessanter Seiten.
Passend zu diesem Thema enthält das Thema Aktivitäten und Materialien eine Auswahl interessanter Seiten.
Interaktiver Inhalt H5P
Die H5P-Aktivität ermöglicht das Erstellen von interaktiven Inhalten wie interaktiven Videos, Fragebögen, Drag-and-Drop-Fragen, Multiple-Choice-Fragen, Präsentationen und vielem mehr. In dieser Handreichung finden Sie eine Erklärung zu den Inhaltstypen:
I. Interaktive Videos
II. Timeline
III. Multiple Choice
IV. Arithmetic Quiz
V. Course Presentation
VI. Essay
VII. Documentation Tool
VIII. Speak the Words/Speak the Words Set
IX. Dialog Cards
Interaktiver Inhalt mit H5P hinzufügen
- Schalten Sie in den Bearbeitungsmodus mit der Schaltfläche Bearbeiten einschalten.
- Klicken Sie im gewünschten Themenbereich auf Aktivität oder Material anlegen.
- Wählen Sie unter Aktivitäten “Interaktiver Inhalt” aus und bestätigen Sie die Auswahl mit Hinzufügen.
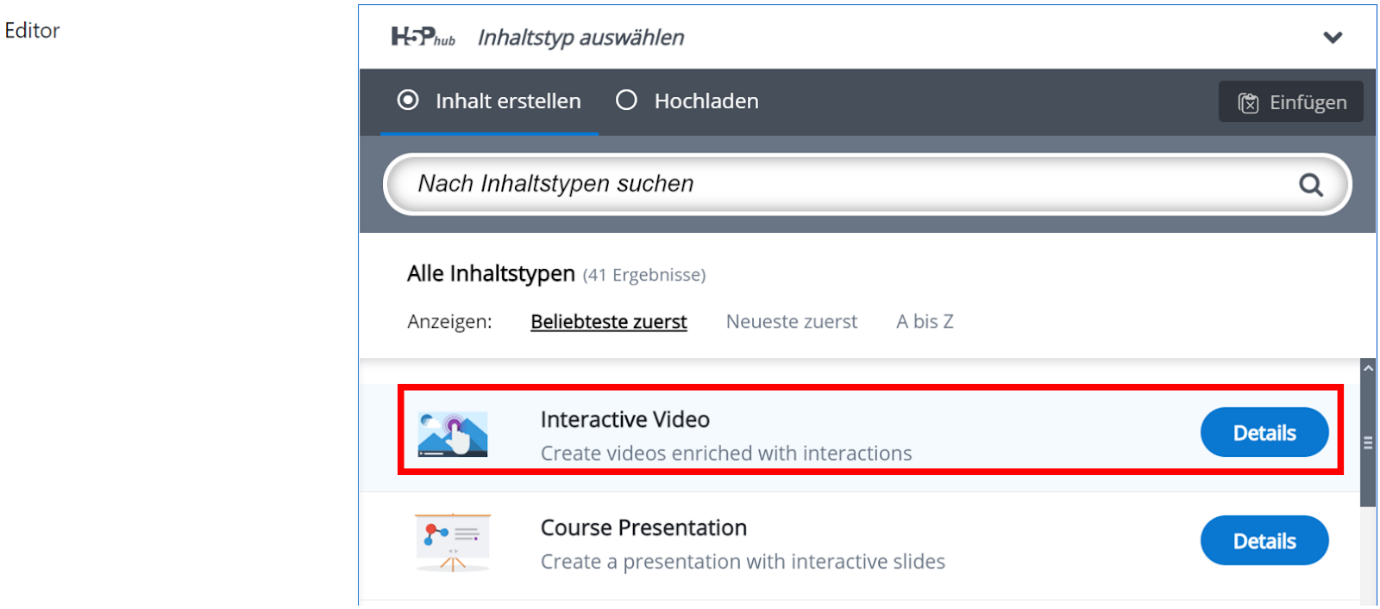
- Unter Editor können sie den Inhaltstyp über die Suchleiste suchen und auswählen.
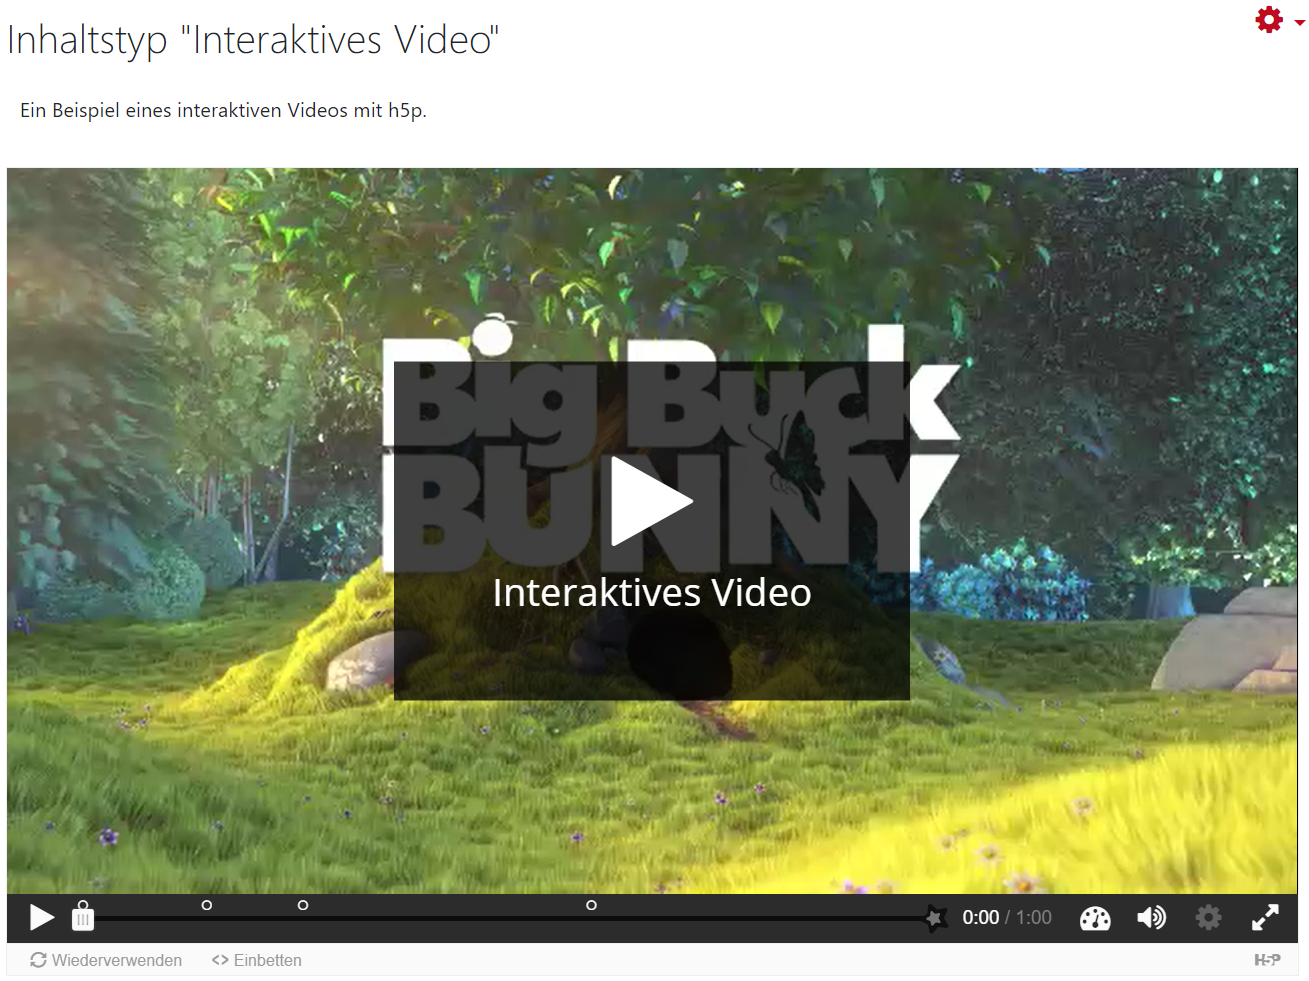
I. Interaktive Videos
Warum interaktive Videos?
Eigenständige Überprüfung des Lernfortschritts Entwicklung von individuellen Lernwegen Motivation Lernaktivierung
- Unter Editor wählen Sie Interactive Video aus und geben Sie der Aktivität einen aussagekräftigen Namen.
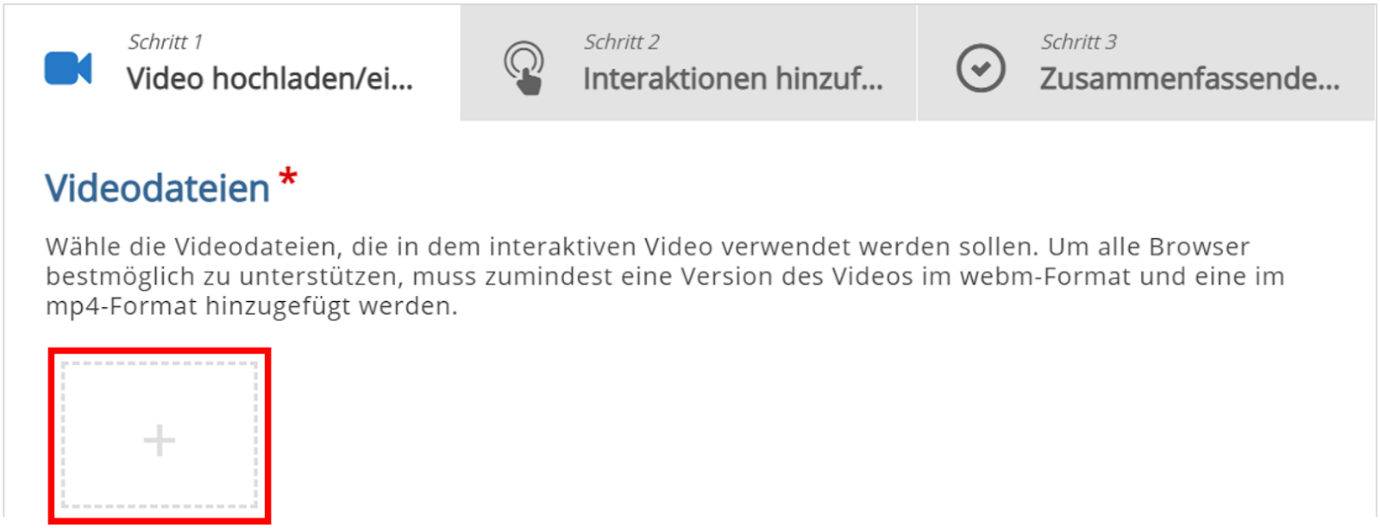
- Schritt 1: Video hochladen/einbetten können Sie eine Video-Datei hinzufügen. Mit einem Klick auf das Plus-Symbol können Sie eine VideoDatei aus Ihrem PC hochladen. Als Alternative können Sie ein Video aus YouTube hochladen, indem Sie die Video-URL einfügen.
Unterstützte Formate: .mp4, .webm, .ogv
Bitte auf Urheber- oder Persönlichkeitsrechte Dritter achten.
- Im Schritt 2: Interaktionen hinzufügen können Sie über die Leiste oberhalb des Players verschiedene visuelle und interaktive Elemente (Interaktionen) in das Video einbetten.
Bei jeder Interaktion haben Sie folgende Einstellungsmöglichkeiten:
o Anzeigezeit: Einstellung der Zeitspanne, in der der Inhalt sichtbar ist.
o Anzeigen als:
- Button: die Nutzer müssen zuerst auf den Button klicken, um den Inhalt zu lesen.
- Poster: der Inhalt wird direkt auf dem Video angezeigt.
o Beschriftung: kann wahlweise angegeben werden.
o Text: Angabe des eigentlichen Inhalts.
Außerdem können Sie bei Test-Interaktionen folgende Einstellungen vornehmen:
o Hintergrunddeckkraft für bewegliche Elemente: Punkte-Bereich und Rückmeldung definieren
o Adaptivität: abhängig von der Beantwortung der Aufgabe, einen Sprung an eine andere Stelle des Videos bzw. eine Nachricht festlegen
- Aktion, wenn alles richtig ist
- Aktion, wenn alles falsch ist
Sie können aus folgenden Interaktionen auswählen:
![]() Label
Label
![]() Text
Text
![]() Table
Table
![]() Link
Link
![]() Image
Image
![]() Statements
Statements
Dabei können zusammenfassende Aussagen angegeben werden, aus denen eine die richtige ist.
![]() Single Choice Set
Single Choice Set
Damit können Fragen gestellt und mehrere Antwortmöglichkeiten angegeben werden. Es gibt nur eine richtige Lösung.
![]() Multiple Choice
Multiple Choice
Bei Multiple Choice können mehrere Antworten richtig sein.
![]() True/False Question
True/False Question
![]() Fill in the Blanks
Fill in the Blanks
Hiermit kann einen Lückentext erstellt werden.
![]() Drag and Drop
Drag and Drop
Drag and Drop ermöglicht die Erstellung einer Zuordnungsaufgabe. Studierende müssen Texte oder Bilder an einen oder mehrere Zielbereiche schieben.
![]() Mark the Words
Mark the Words
Dabei müssen Studierende das richtige Wort in einem Text markieren.
![]() Drag Text
Drag Text
Damit können Zuordnungsaufgaben erstellt werden. Die Wörter werden aus einer vorgegebenen Wortsammlung an Zielbereiche im Text geschoben.
![]() Crossroads
Crossroads
Diese Interaktion definiert Sprungmarken zu verschiedenen Zeitmarken im Video.
![]() Navigation Hotspot
Navigation Hotspot
Mit Navigation Hotspot können Bereiche im Video definiert werden, die auf eine Website oder eine Zeitmarke verweisen.
Wie die Interaktionen eingefügt werden, wird anhand eines Beispiels erklärt:
Multiple Choice
o Klicken Sie das Symbol für Multiple Choice (![]() )
)
o Bestimmen Sie die Anzeigedauer und die Art der Darstellung. Wahlweise können Sie eine Beschriftung angeben.
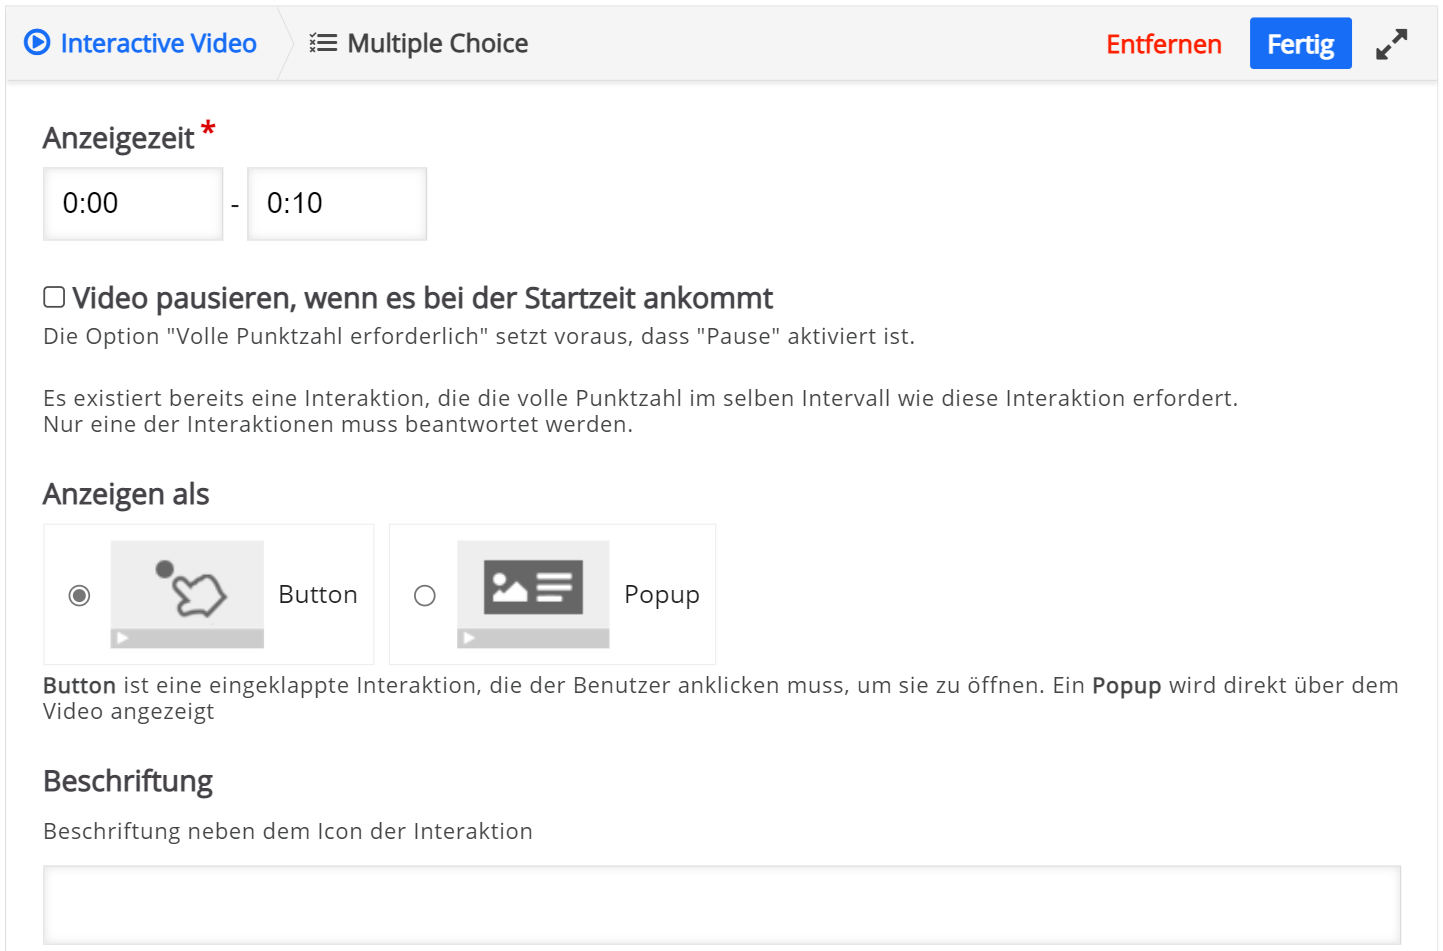 o Als nächstes finden Sie das Textfeld Frage, wobei die zu beantwortenden Frage eingegeben werden muss.
o Unter Verfügbare Optionen tragen Sie die verschiedenen Antwortmöglichkeiten ein. Die korrekten Antworten markieren Sie jeweils durch ein Häkchen bei Richtig.
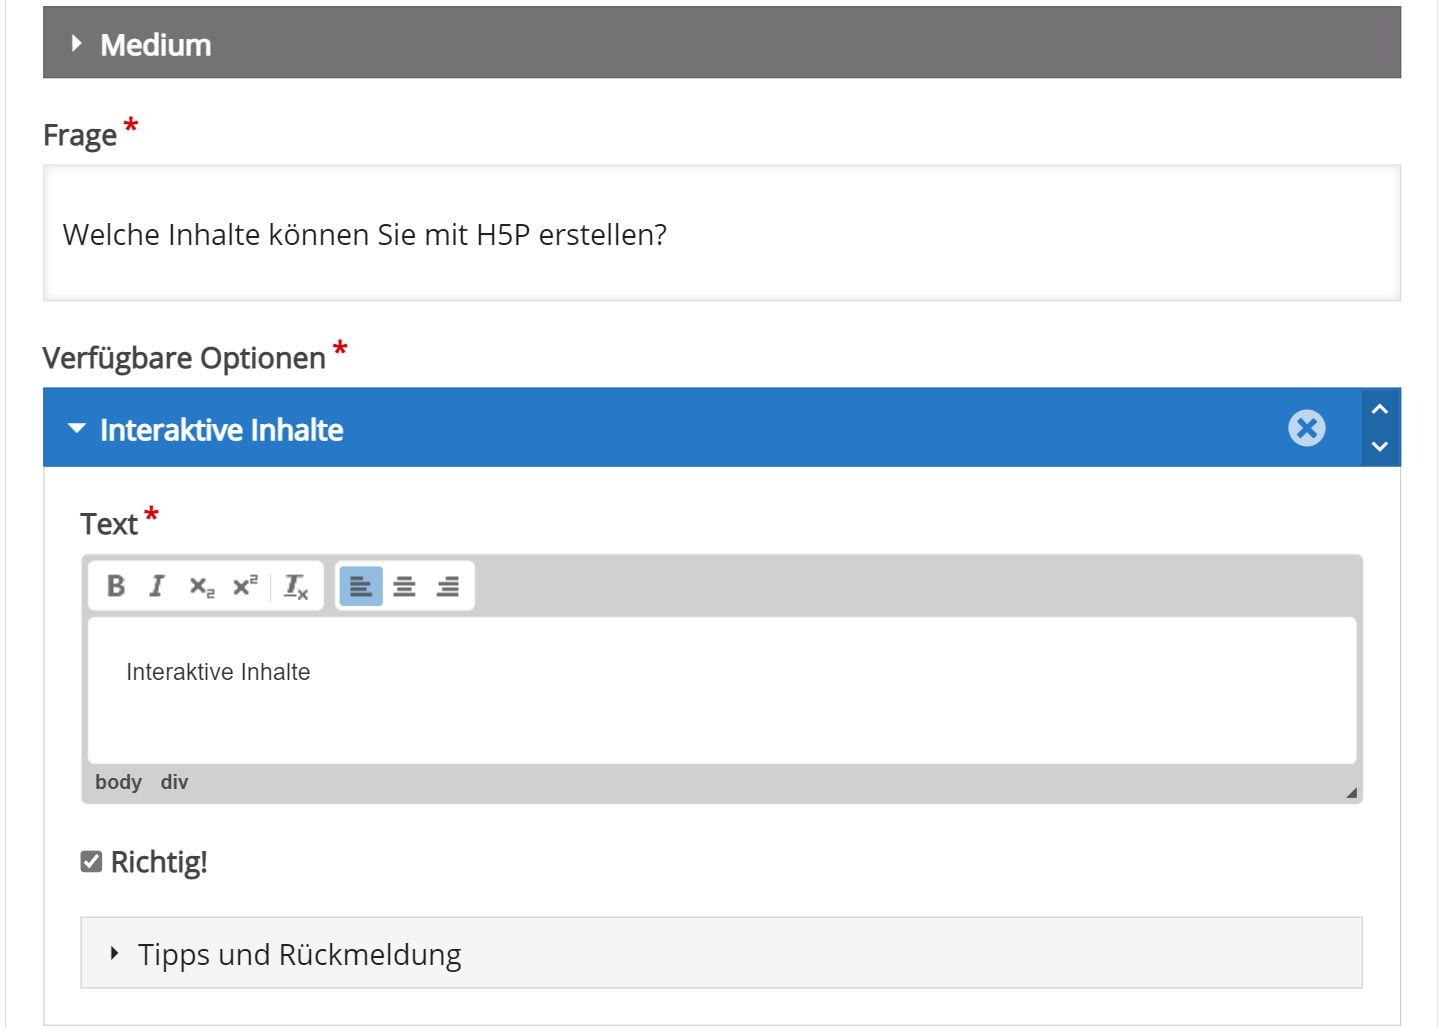
o Zu jeder Option können Sie unter Tipps und Rückmeldung ein spezifisches Feedback hinzufügen.
o Mit der Gesamtrückmeldung können Sie zu verschiedenen Wertebereichen in Prozent der maximal erreichbaren Punktzahl der Aufgabe entsprechende Hinweise geben.
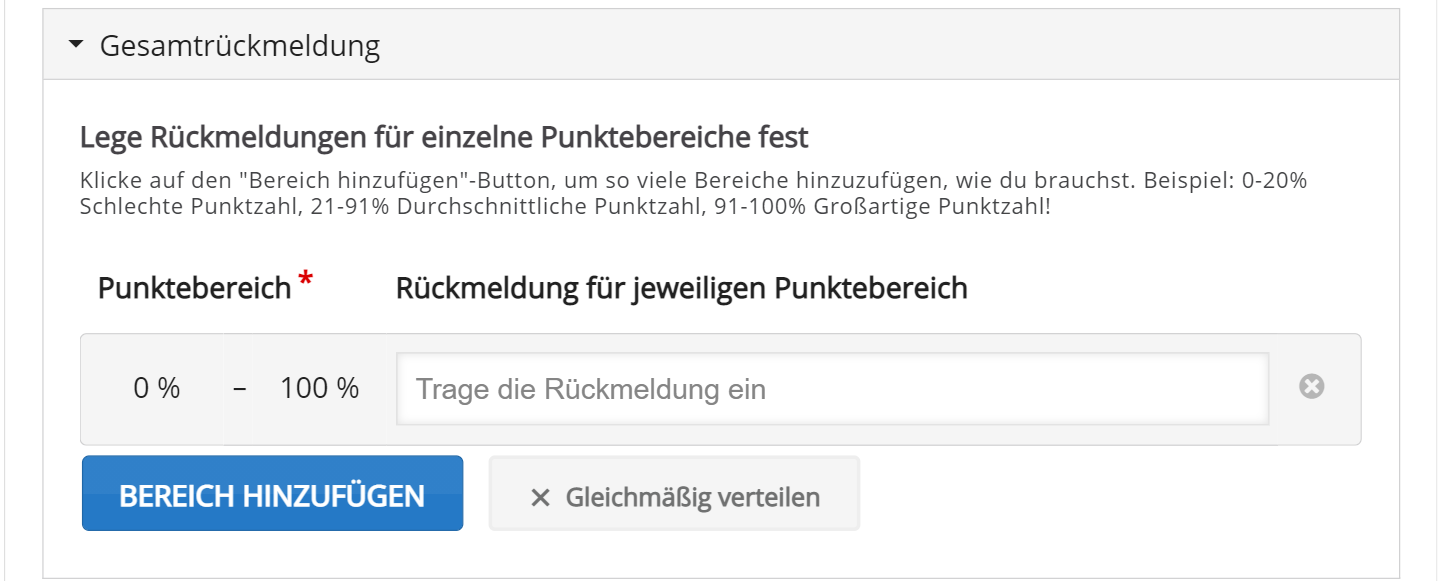
o Unter Verhaltenseinstellungen können Sie bei Bedarf weitere Eigenschaften ändern.
o Unter Reaktionen auf Nutzereingaben können Sie einen Sprung auf eine andere Stelle des Videos sowie eine Nachricht festlegen.
o Mit einem Klick auf Fertig beenden Sie die Bearbeitung der Interaktion.
o Mit Lesezeichen (![]() ) kann das Video in mehrere Kapitel unterteilt werden.
) kann das Video in mehrere Kapitel unterteilt werden.
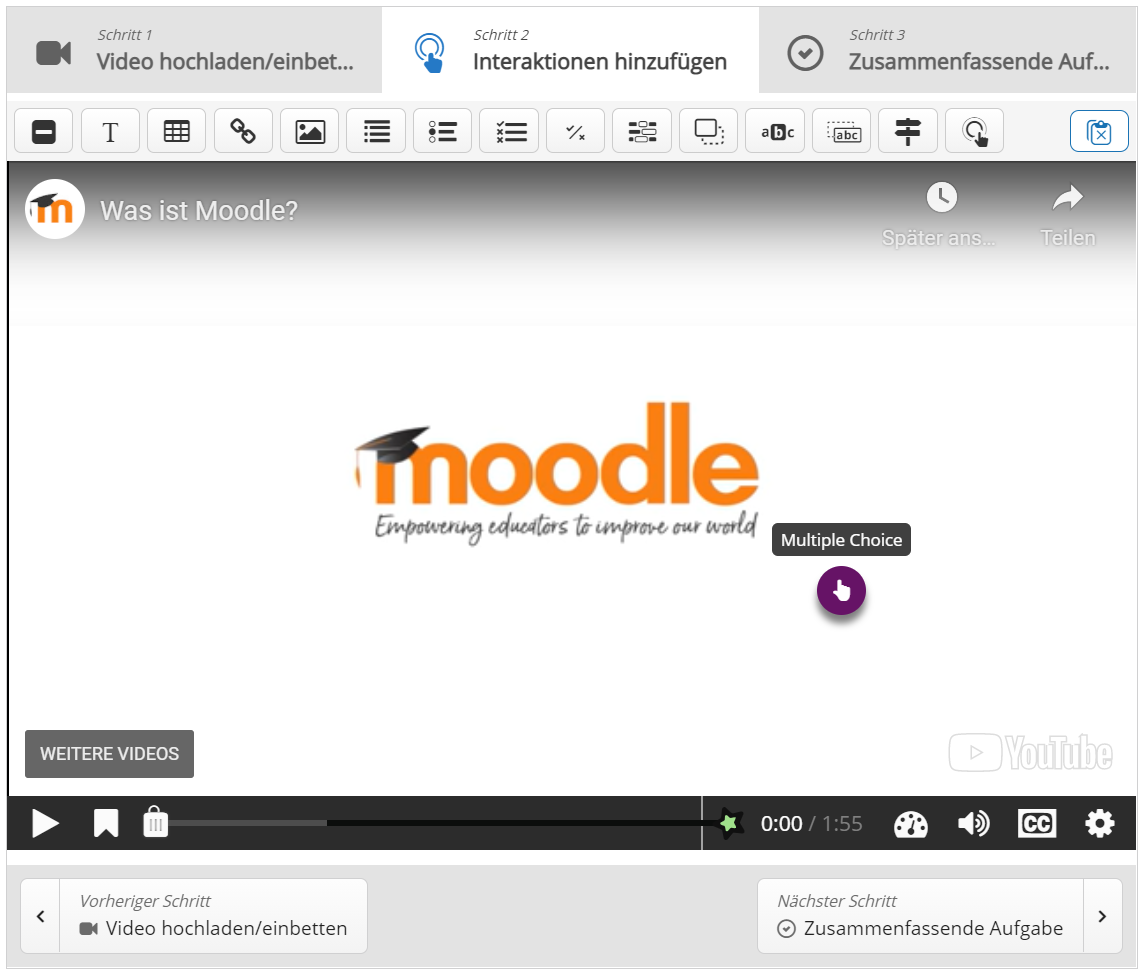
- In Step 3: Summary task, you can add a summary task that appears at the end of the video.
- To check the activity, click Save and Display.
- Alternatively, click Save and return to course to go directly back to the course.
II. Timeline
Why Timeline?
- Illustrates the development of a concept
- Materials with historical aspects
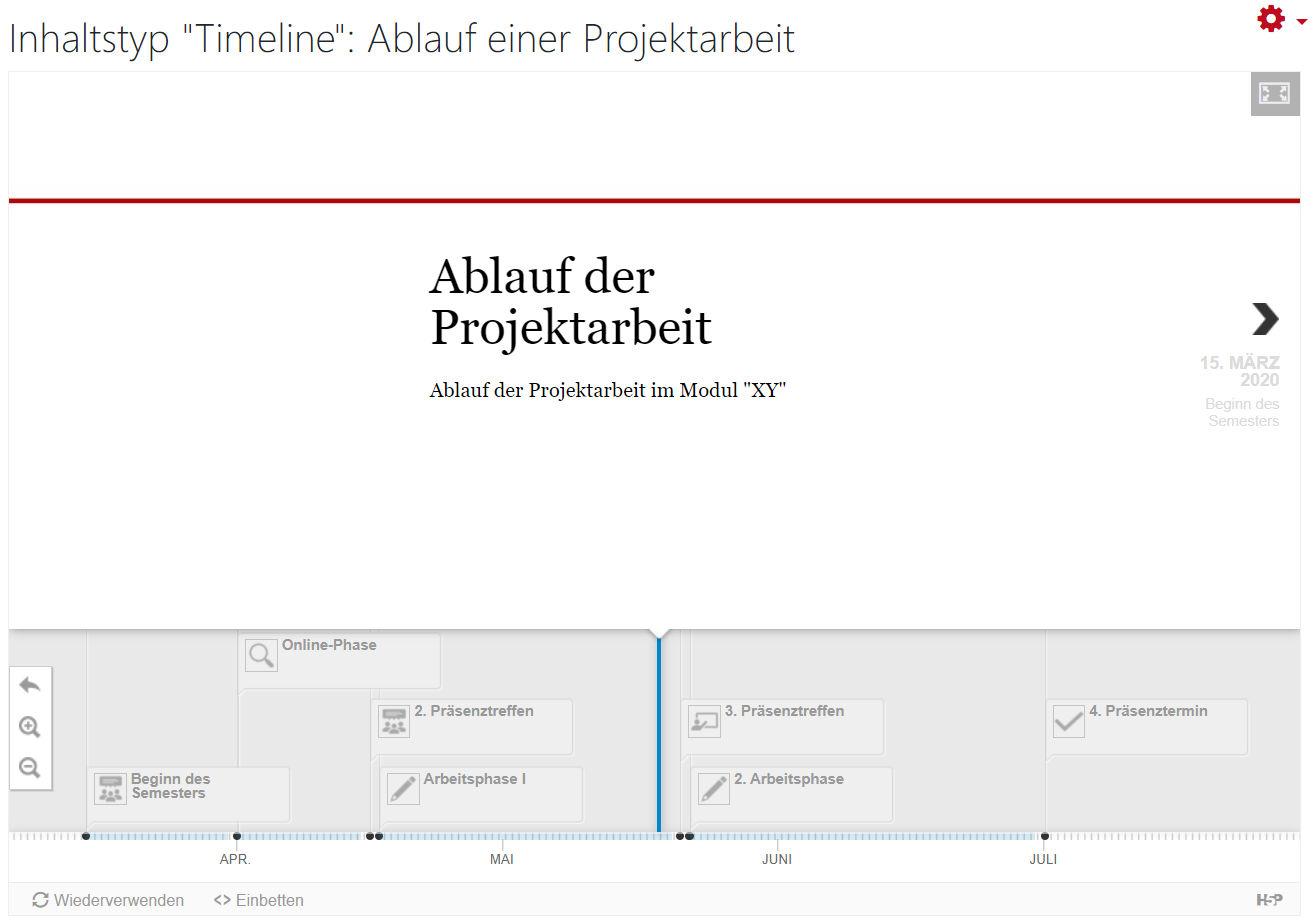
- Representation of a chronological process (also for projects)
This content type allows the creation of an easy-to-edit interactive timeline, where you can add images, texts, and content from social media platforms such as Twitter, YouTube, Flickr, Vimeo, Google Maps, and SoundCloud.
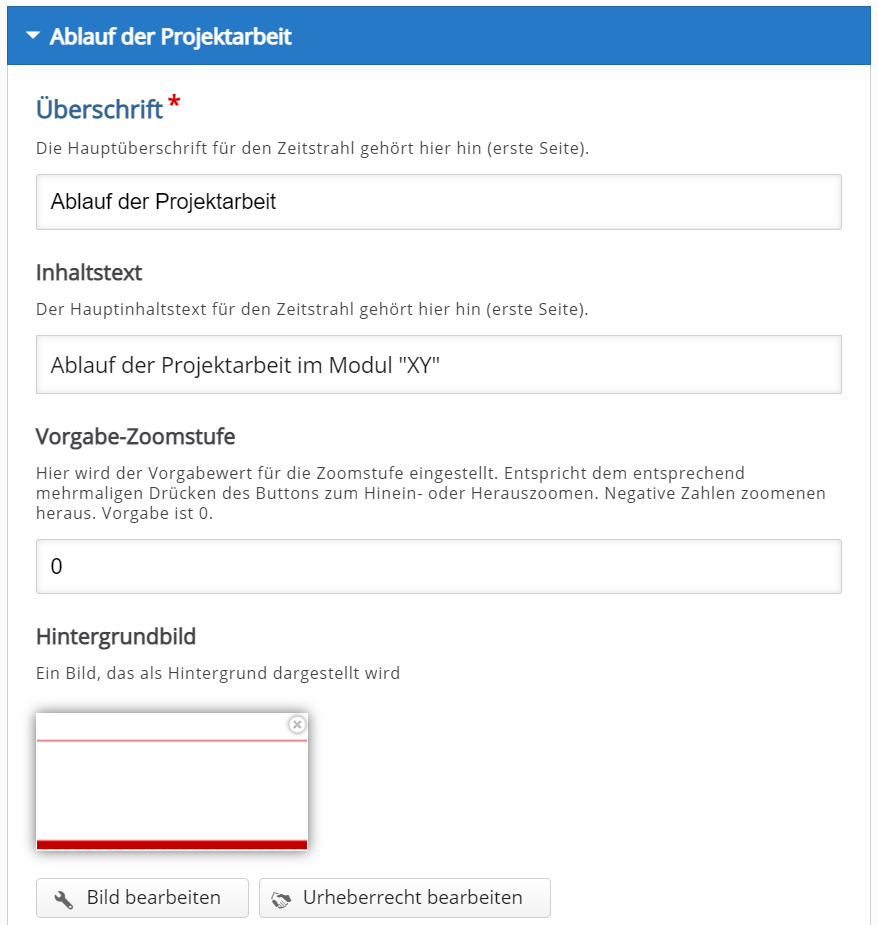
• In the Editor, select Timeline.
 • First, give your timeline a descriptive Name.
• Optionally, you can add a brief description and a background image.
 • In the Data section, add the first event. Fields marked with an asterisk (*) are required.
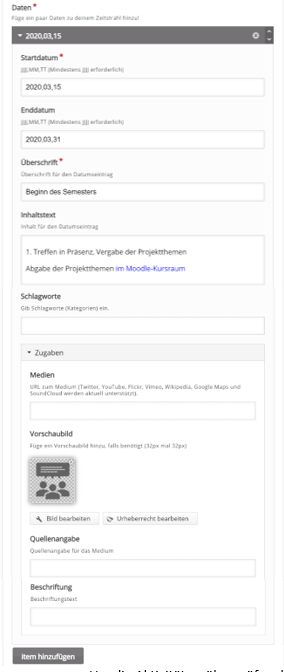 • In the Extras section, you can adjust other settings. For example, you can embed media via URL and set a preview image, and choose other languages.
• Click Add item to add a new date.
• To check the activity, click Save and Display.
Alternatively, click Save and return to course to go directly back to the course.
III. Multiple Choice
Why Multiple Choice?
This content type is suitable for closed questions with one or more correct answers.
• In the Editor, select Multiple Choice and give it a descriptive Name.
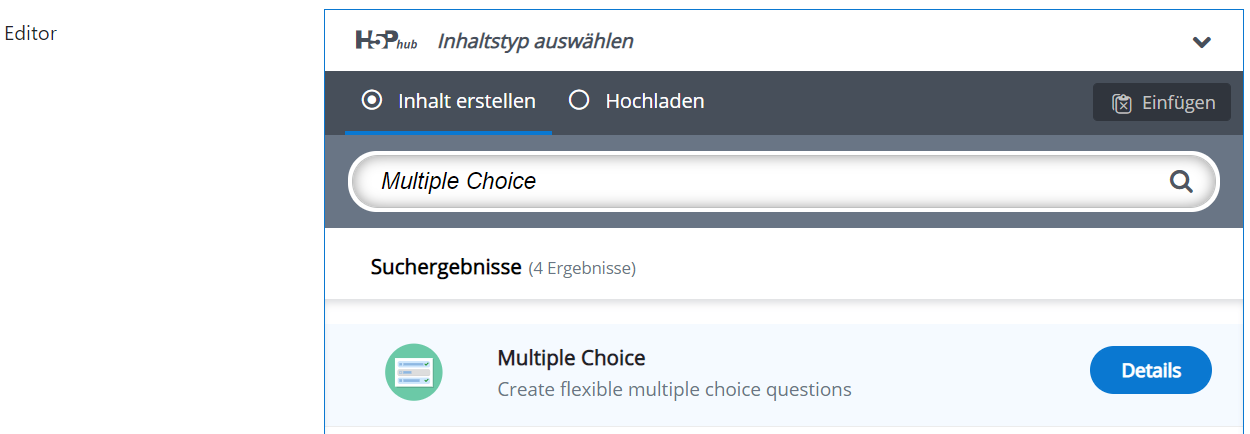 • You can optionally add an image or video by clicking Media.
 • Enter the question in the Question text field.
• In the Available Options section, provide the different answer options. Mark the correct answers by checking the Correct box.
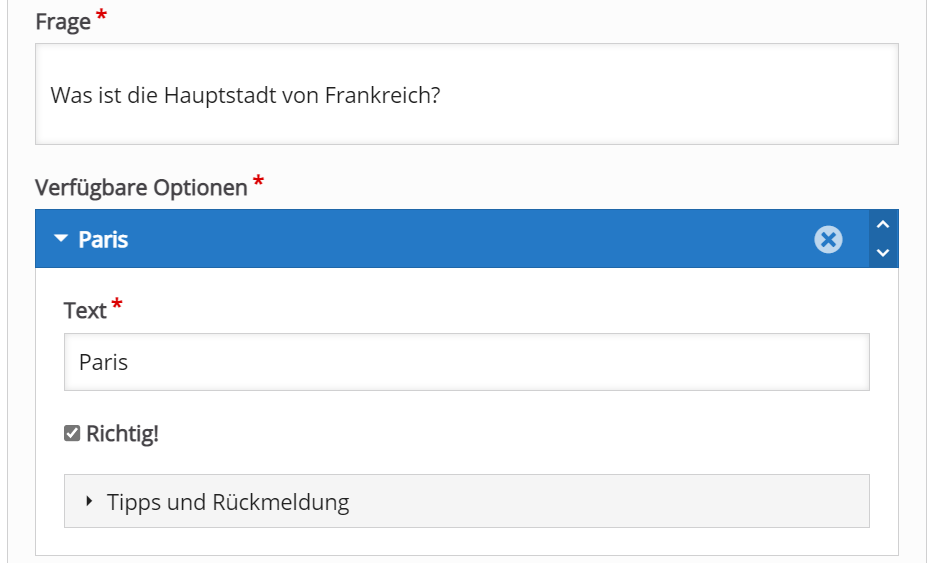 • In the Tips and Feedback section, you can add specific feedback for each option.
• In the Overall Feedback section, you can provide feedback based on percentage ranges of the maximum achievable score for the task.
• Under Behavioral settings, you can find additional editing options.
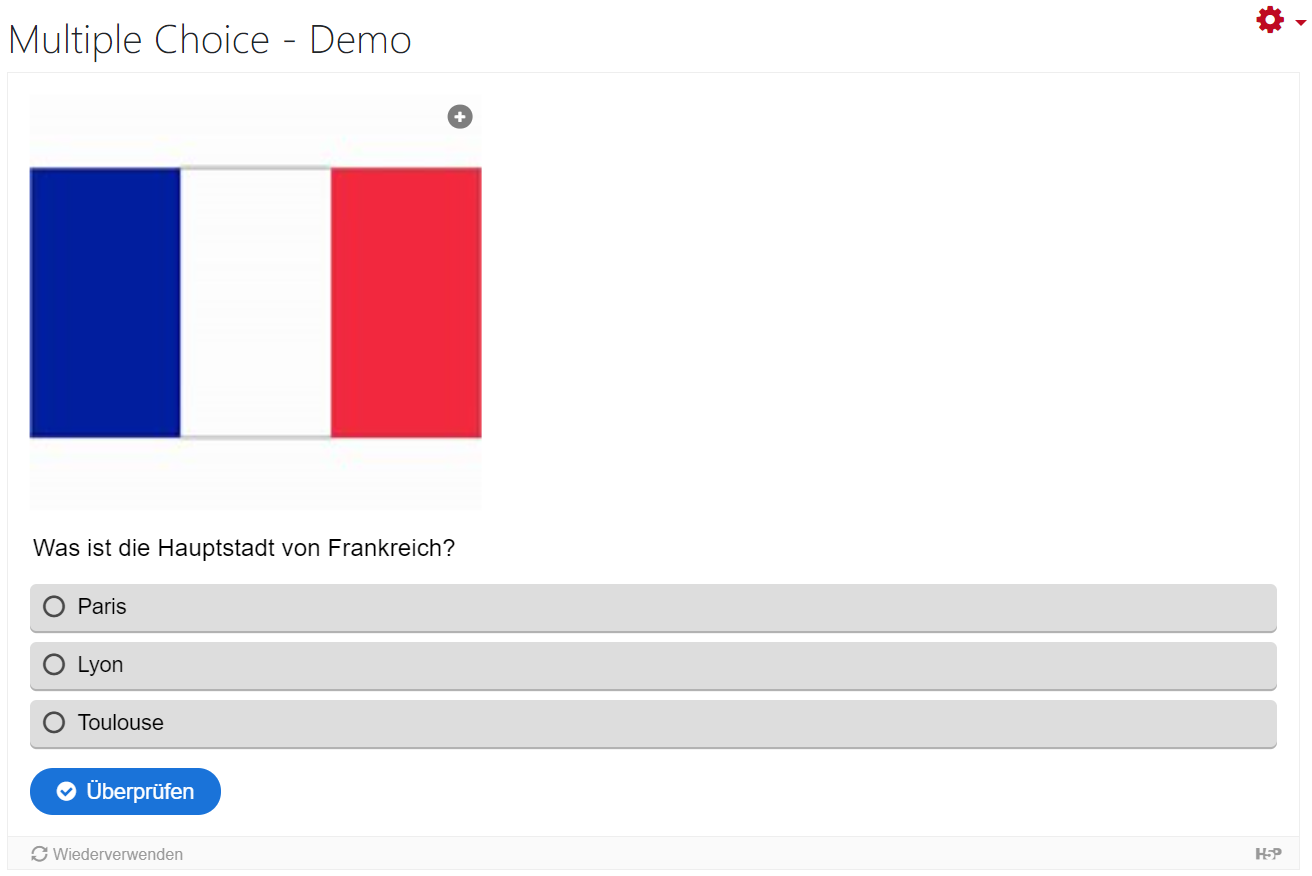
• To preview the activity, click Save and Display.
Alternatively, you can click Save and return to course, and you will be redirected to the course directly.
IV. Arithmetic Quiz
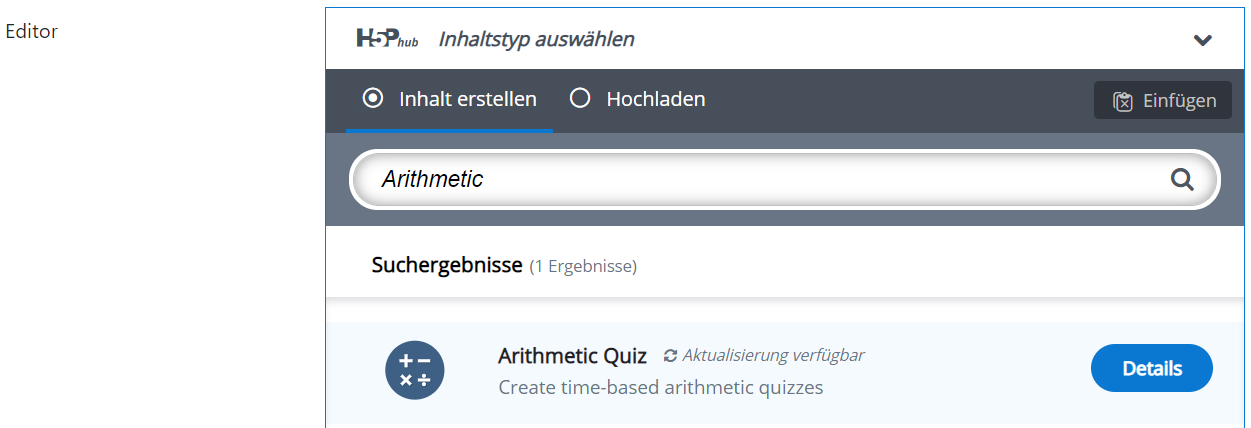
• In the Editor, select Arithmetic Quiz and provide a name.
• First, you can enter an introductory text under Intro.
 • Under Arithmetic Type, choose the desired arithmetic operation and the number of questions.
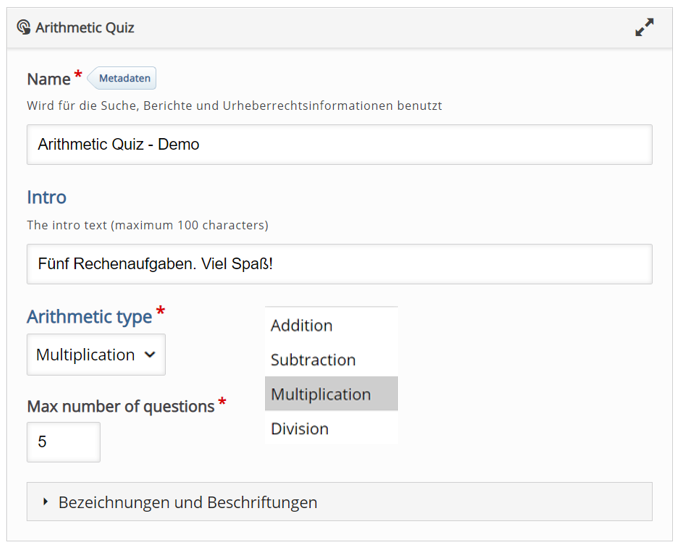 • In Labels and Captions, you have the option to switch the language.
• To preview the activity, click on Save and Display.
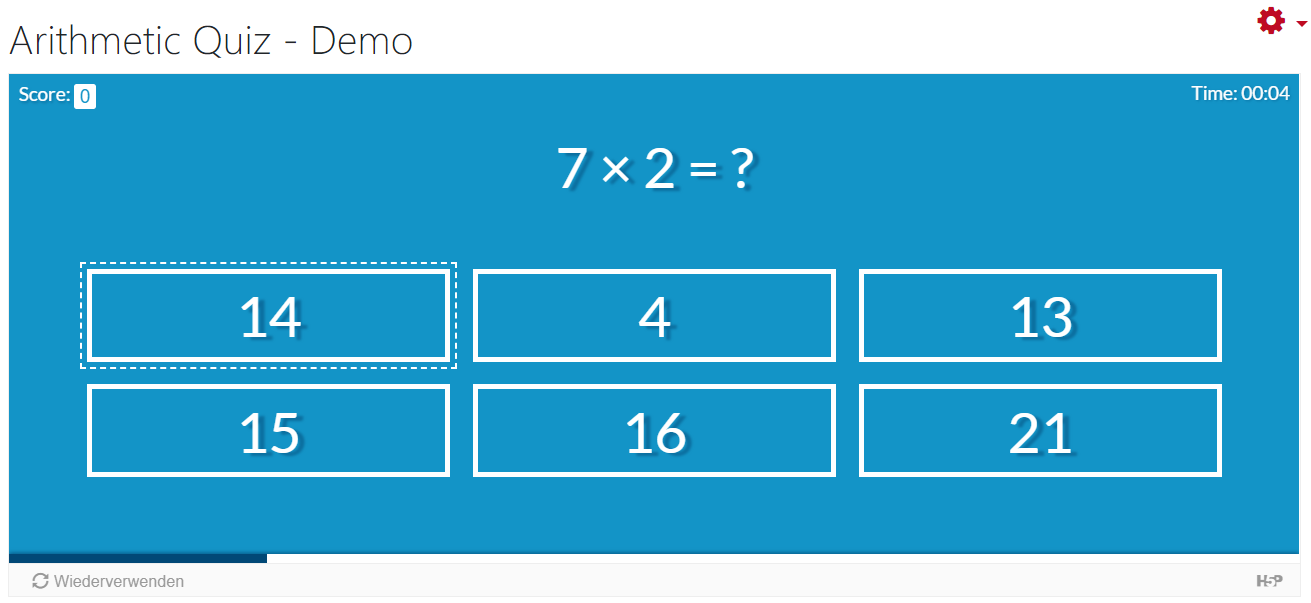
Alternatively, you can click Save and return to course, and you will be directed back to the course.
Note: Since the difficulty level cannot be adjusted, more complex tasks can be better created using the interactions Fill in the Blanks and Drag and Drop (see Part I).
V. Course Presentation
Why Course Presentation?
- An alternative to PowerPoint or PDF
- Enhancement of a PowerPoint with interactive elements
- Combines all possible h5p interactions in one content type
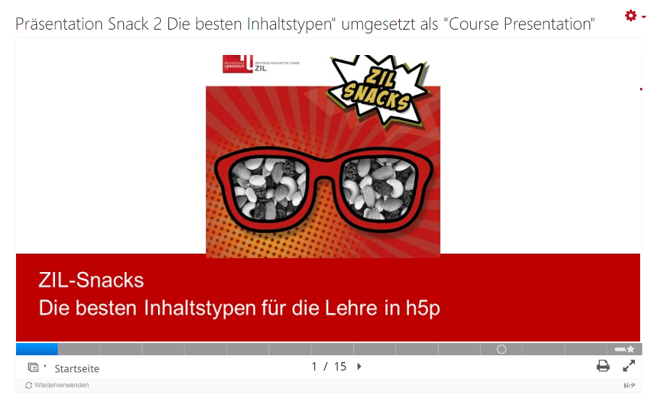
This task type allows you to create a slide presentation. Interactive elements such as images, audio, and video clips, as well as quiz types, can be embedded into the presentation. This content type gathers all the interactive features from h5p.
Important Information: To insert your presentation slides, you must save them as individual images (in .jpg or .png format). You can do this in PowerPoint using the „Save As“ function. The individual slides will then be saved as separate images in a folder.
• In the Editor, select Course Presentation and enter a name.
• With the Course Presentation Editor, you can add various interactions (see Part I, Point 3).
Additionally, you have the following options:
![]() New Slide
New Slide
![]() Duplicate Slide
Duplicate Slide
![]() Slide Background
Slide Background
![]() Move Slide Left
Move Slide Left
![]() Move Slide Right
Move Slide Right
![]() Delete Slide
Delete Slide
Some modification options are explained using an example.
• Clicking the symbol (![]() ) will show your slides in an overview. You can give each slide a title, which helps structure the content and provide clear navigation.
) will show your slides in an overview. You can give each slide a title, which helps structure the content and provide clear navigation.
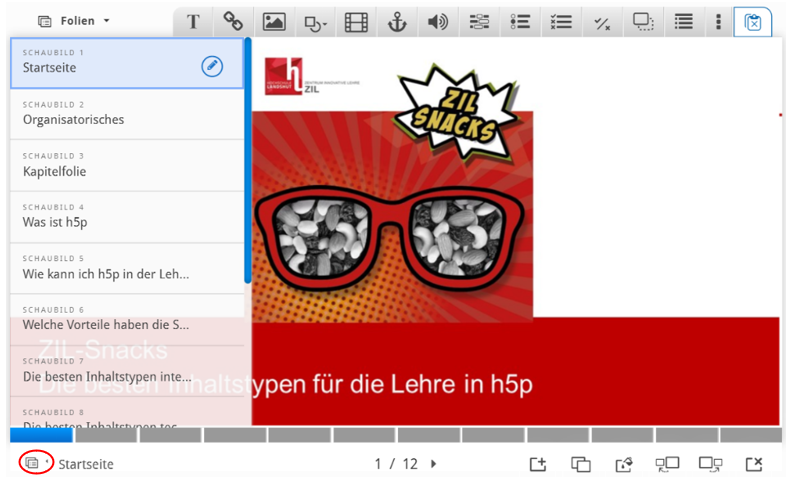
• By clicking (![]() ) a dialog window for editing the background will open. To apply the background to all slides, select Master Slide. Otherwise, choose This Slide. The changes are automatically saved.
) a dialog window for editing the background will open. To apply the background to all slides, select Master Slide. Otherwise, choose This Slide. The changes are automatically saved.
• Text or titles can be added with (![]() ) You can find various settings, which can be saved by clicking Done.
) You can find various settings, which can be saved by clicking Done.
• Click the symbol (![]() ) to add a new slide.
) to add a new slide.
• Click the image symbol to insert a picture (![]() ).
).
Important: To insert already prepared presentation slides, click the image symbol and then select the corresponding slide from the saved presentation folder.
• You can add various interactions to the presentation. By clicking on Drag and Drop (![]() ), you can create a matching task.
), you can create a matching task.
In Step 1: Settings, you can make various adjustments.
In Step 2: Task, you first define the drop zones (![]() ). If only one element is allowed in the field, check the box for This drop zone can contain only one element. Click Done to save.
). If only one element is allowed in the field, check the box for This drop zone can contain only one element. Click Done to save.
Next, create the draggable elements, which can be either text or images ( ).
).
Select all the drop zones that the element can be dragged to, including distractors.
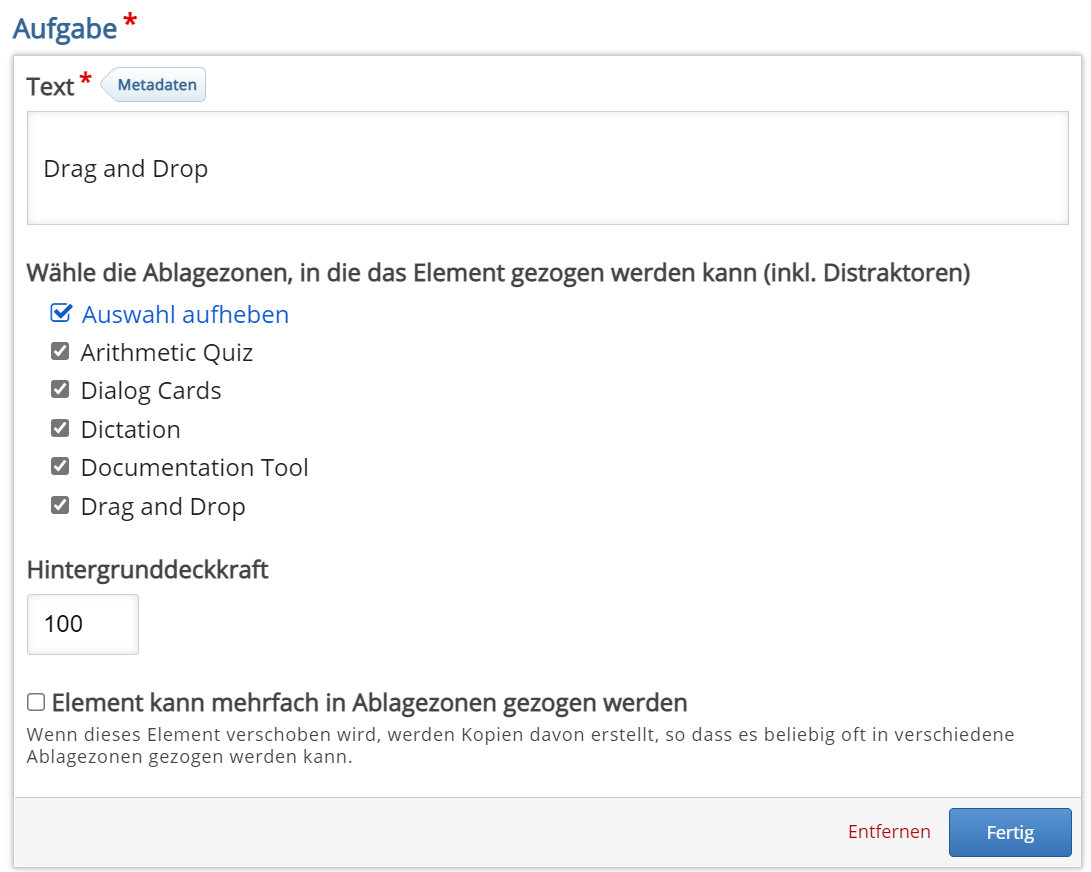 Finally, select the correct solution for each drop zone.
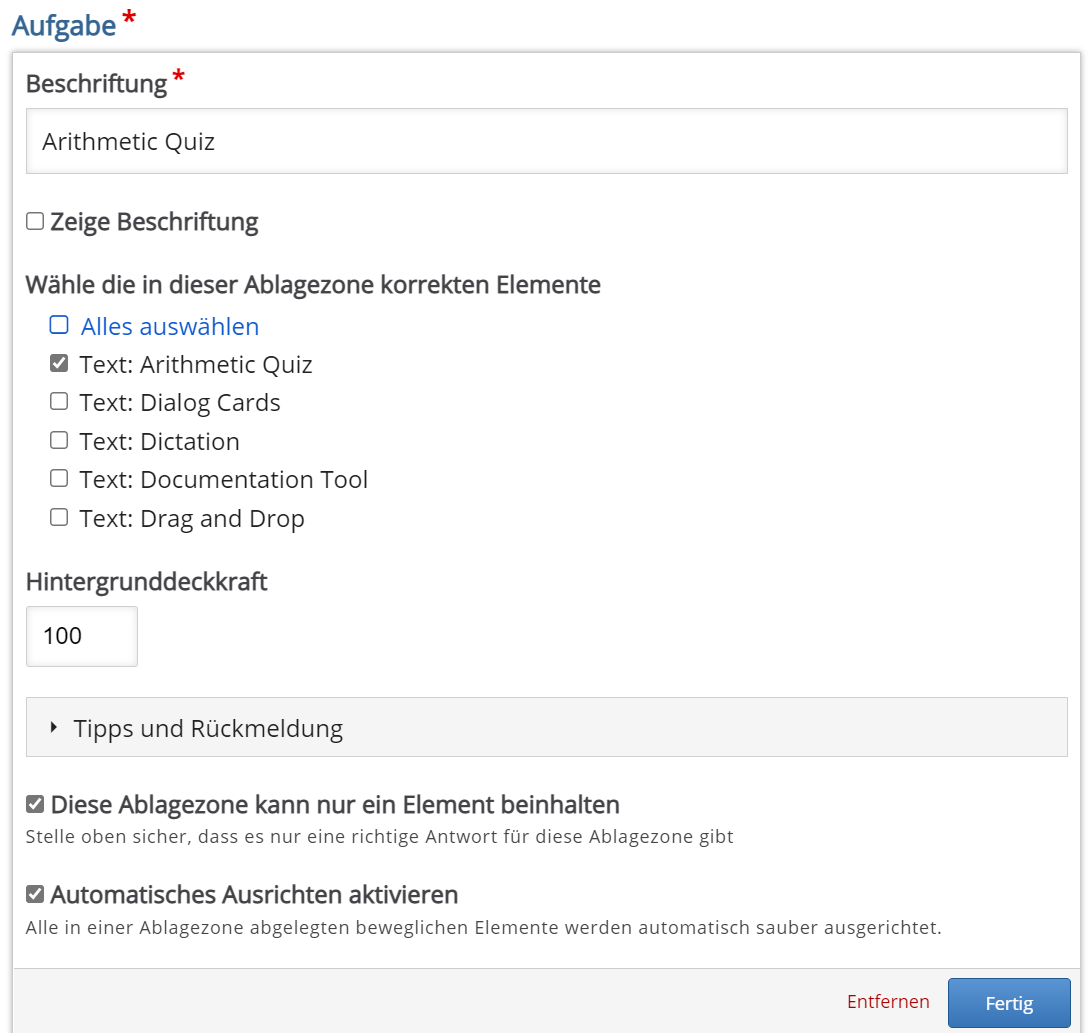
At the bottom, you can define a point range and allow task repetition or penalize incorrect answers. Finally, save your changes by clicking Done.
• As with other content types, you can create a summary task at the end of the presentation (![]() ), with the first statement being correct.
), with the first statement being correct.
• To review the activity, click Save and Display. Alternatively, you can click Save and Return to Course, and you will be taken directly back to the course.
VI. Essay
Why Essay?
- Creation of summary texts
- Describing a scientific experiment using technical terms
- Writing a picture description
- Summaries
- Alternative to multiple-choice questions
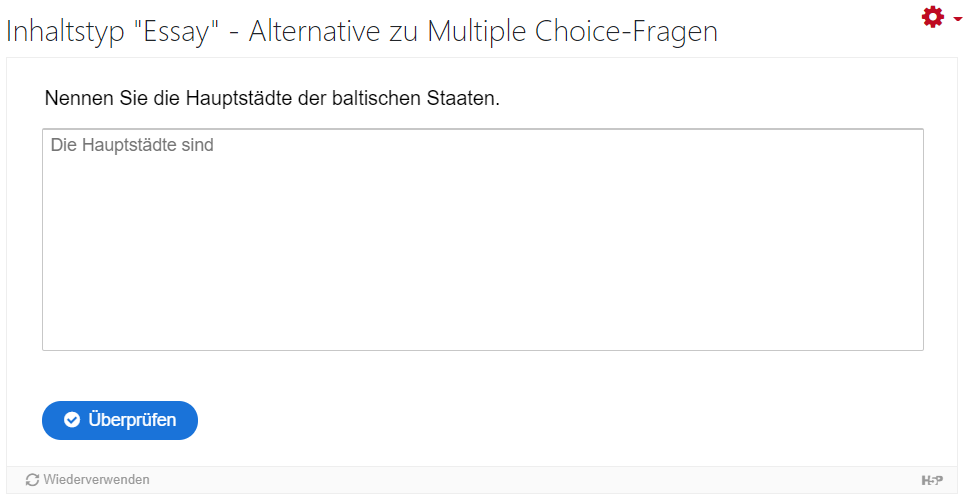
This task type allows you to give automatic feedback on texts. You can enter any number of „keywords“ that are expected in the submitted text by the students. Please note that complete texts cannot be provided as feedback or a correct answer, only individual keywords.
•Enter a name, and in the Editor, select Essay.
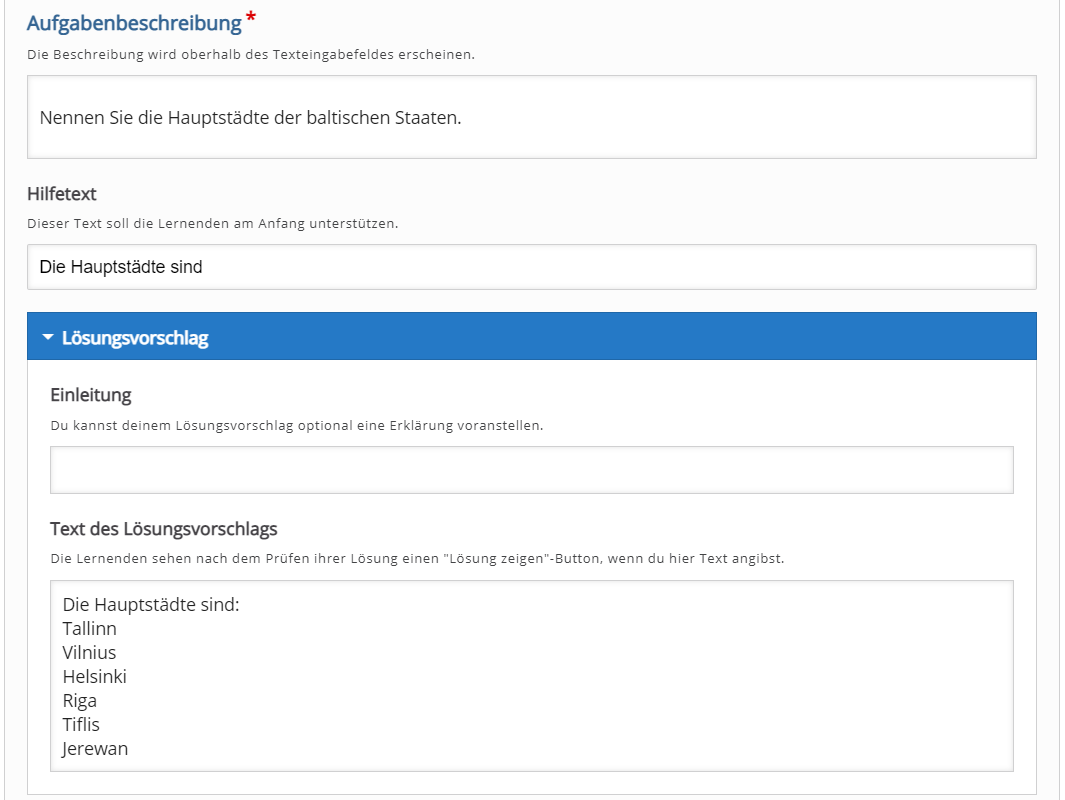
 • In the Task Description, enter the task instructions. Optionally, you can provide a help text as an example. You can also include a Suggested Solution that will be shown after an attempt.
 • Under Keywords, enter the expected terms. If various formulations are possible, enter them under Variations.
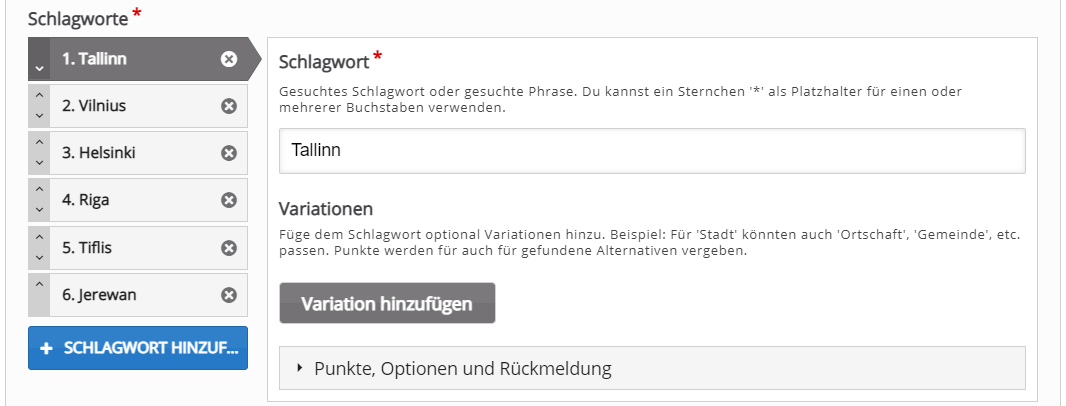 • Optionally, you can set a points range and specific feedback.
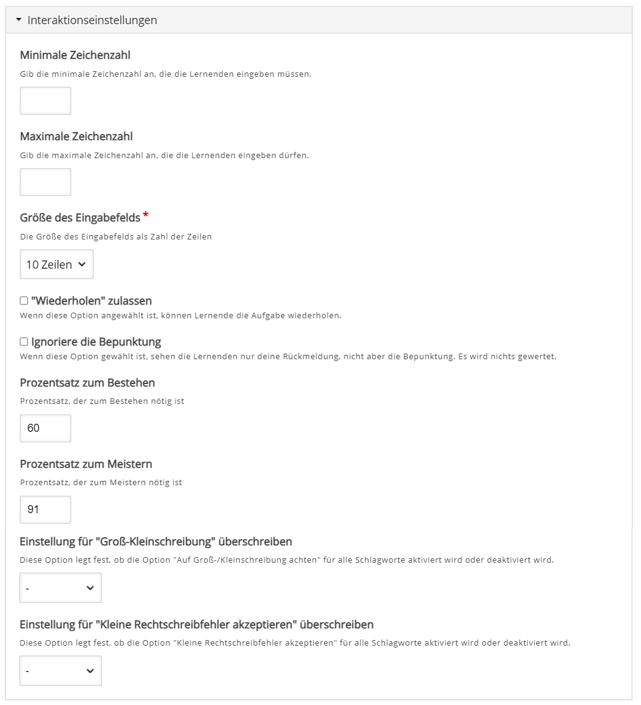
• To ensure that a word used in a different case (e.g., accusative) or tense is recognized, enable the Activated option under Interaction Settings in the last setting.
 • To review the activity, click Save and Display.
Alternatively, you can click Save and Return to Course, and you will be taken directly to the course.
VII. Documentation Tool
Why Documentation Tool?
- Creation of forms and evaluation tools for projects
- Planning and documentation of project or group work
- Self-assessment by students
This content type allows the creation of a multi-step form. It also enables students to input goals and later assess their achievement at the end of the project.
• In the Editor, select Documentation Tool and enter a name. This will be displayed on the course interface.
 • Enter a title. This will appear in the table of contents.
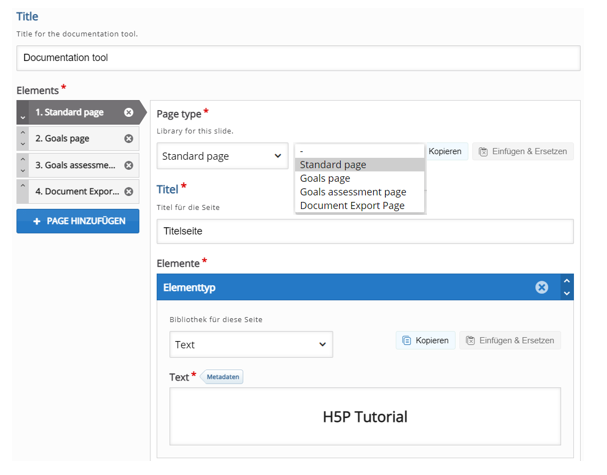
• Under Elements, first define the structure of the document. It consists of various pages, referred to as Pages. Under Page type, the following types of pages are available:
o „Standard page“: Allows insertion of an image, text, and a text input field.
o „Goals page“: A page where students can create text fields for their goals.
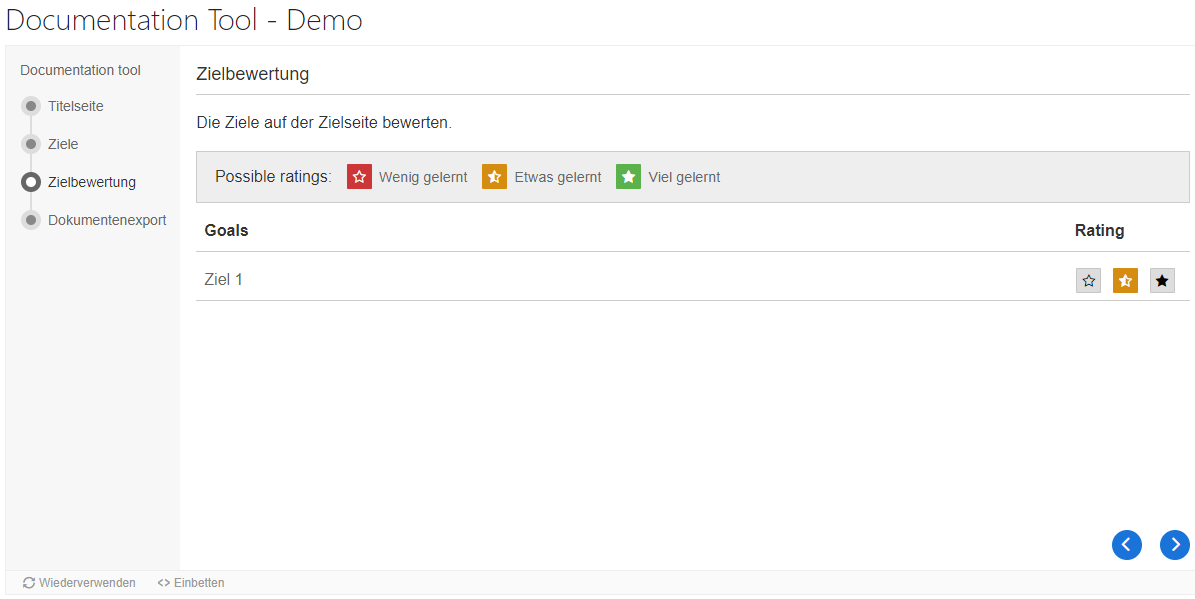
o „Goals assesment page“: A page for assessing the achievement of goals using a traffic light system.
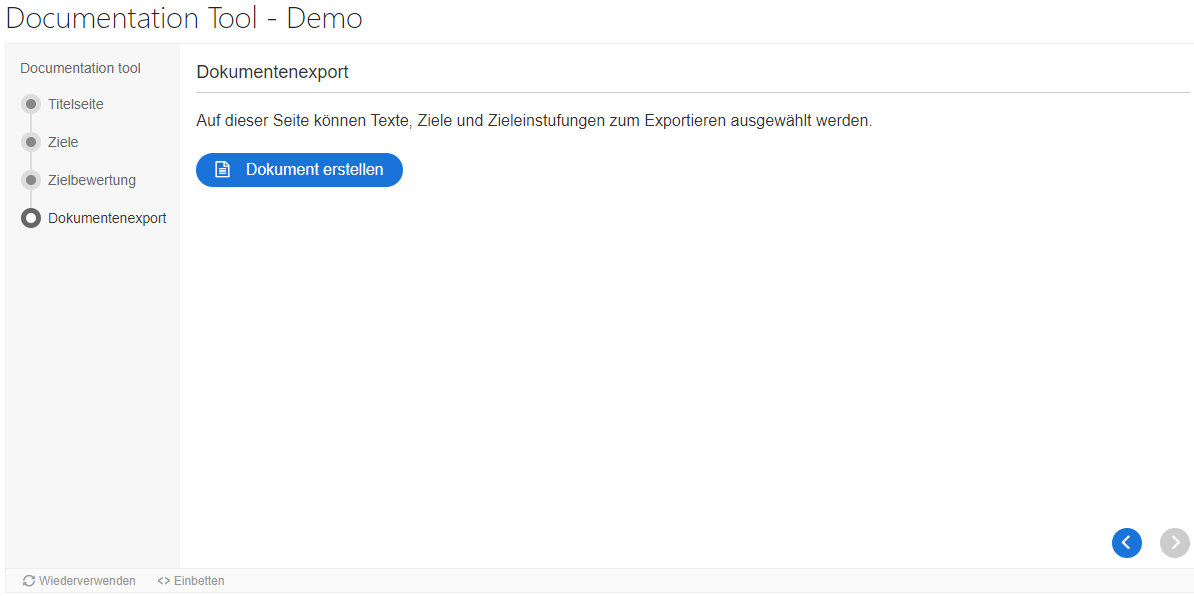
o „Document export page“: The result can be exported to MS Word or copied to the Windows clipboard.
The individual page types and other settings are explained with examples. You can add as many pages as needed and customize your documentation tool.
• Add a „Standard page“ and give it a title. Under Elements, select the type of element you want to add. Click Add Element to insert the next element.
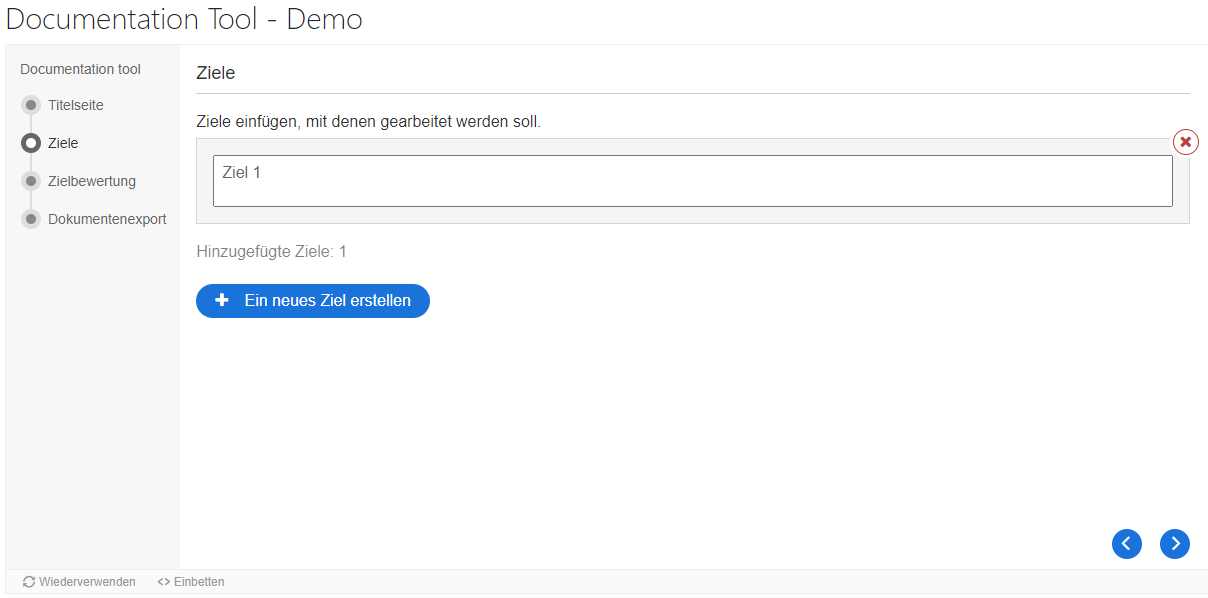
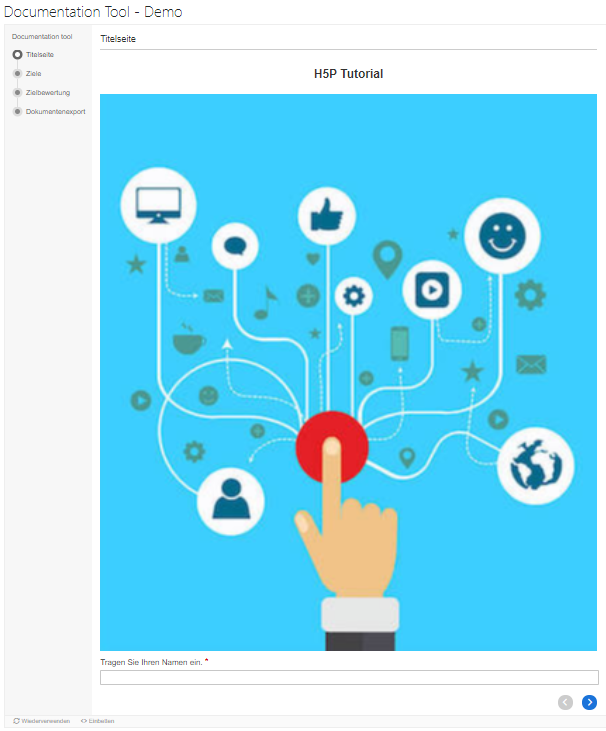 • Click Add Page to create a „Goals page“. On this page, participants can add as many text fields for their goals as needed. Several default texts guide participants through the creation of the fields, which can be modified or replaced with custom texts.
 • Next, add a „Goals assessment page“ where participants can assess their progress at the end of the project or another phase. Like the „Goals page,“ default texts can be modified.
 • For the final page, add a „Document export page“. Here, participants can save and export the completed form or project. Like the previous pages, the default texts can be customized.
 • To review the activity, click Save and Display.
Alternatively, you can click Save and Return to Course, and you will be taken directly to the course interface.
VIII. Speak the Words/ Speak the Words Set
Why Speak the Words?
- Especially interesting for language courses
With the content type Speak the Words, a question is asked, which must be answered via a speech input. The content type Speak the Words Set allows you to ask multiple questions.
Supported Browser: Google Chrome.
• In the Editor, select Speak the Words and enter a name.
 • Under Describe Task, enter the question to be answered. Input the possible answer(s) in the field Accepted answers. For multiple correct answers, click on Add Item. Under Language of speech input, select the language in which the answer is expected.
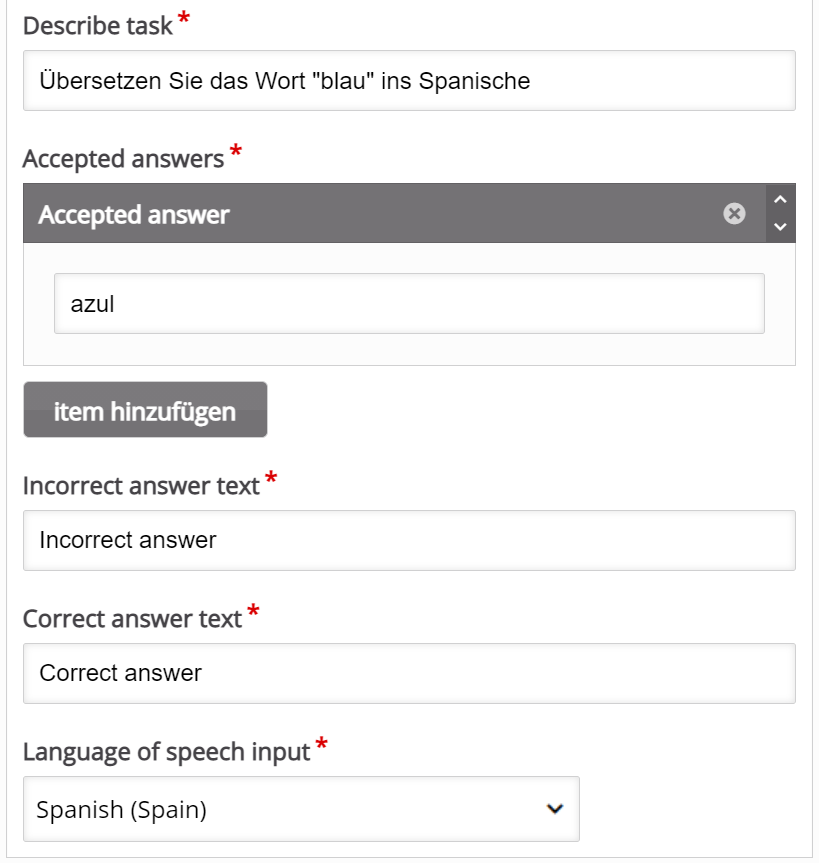 • To review the activity, click Save and Display.
Alternatively, click Save and Return to Course to be taken directly back to the course interface.
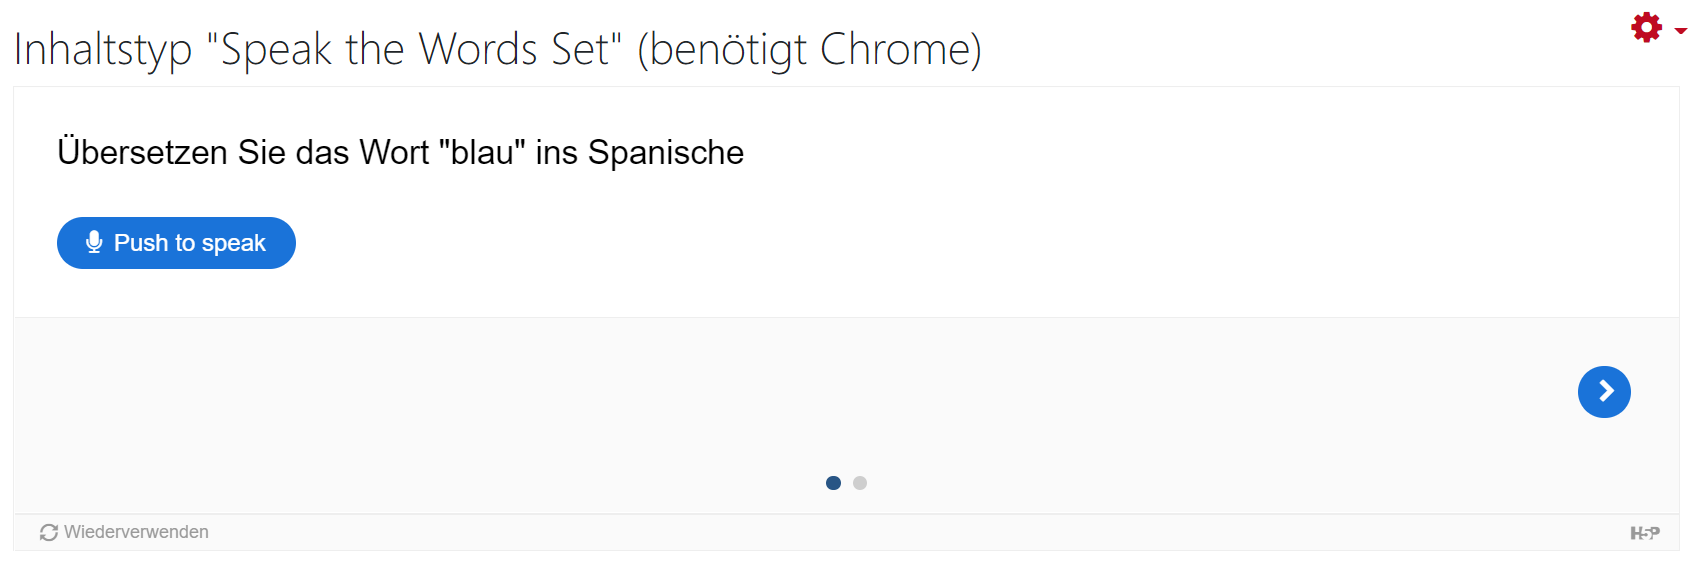
Speak the Words Set
This content type functions in the same way. You create a new question by clicking on Add Question, and each question is designed individually. You can also define feedback for each question.
Important: You must select the language for each question.
IX. Dialog Cards
Why Dialog Cards?
- Virtual flashcards
- Especially interesting for language courses
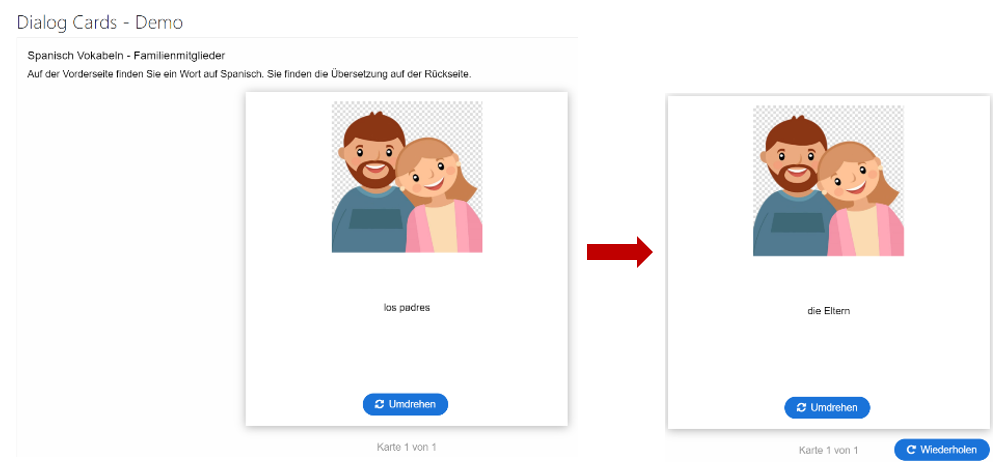
On the front of the card is a question, and on the back is the answer.
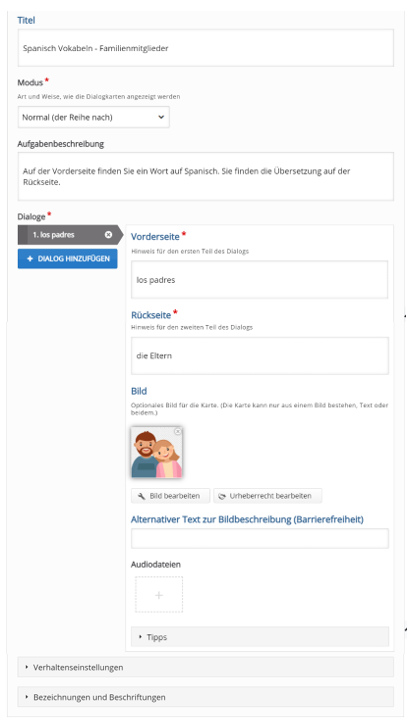
• In the Editor, select Dialog Cards and enter a name.
 • Optionally, provide a title and description for the task.
• Under Text, enter the question or vocabulary. In the Answer field, write the answer, which will appear on the back of the card. You can also upload an image or audio file.
• In Tips, you can provide hints, and under Behavioral Settings, you can specify whether repetition is allowed.
• In Settings and Texts, you can translate the text within the task (see Part IV, Point 4).
• Click on Add Dialog to create the next flashcard.
 • To review the activity, click Save and Display.
Alternatively, click Save and Return to Course to be taken directly back to the course interface.
