Inhaltsverzeichnis
Create Activities (Settings)
Example Activity: Forum
The following outlines the basic settings (using the Forum as an example) that apply when creating all activities.

 Nach dem Klick auf die Schaltfläche Aktivität oder Material anlegen wählen Sie die gewünschte Aktivität aus und klicken Sie diese an.
After clicking the Add Activity or Resource button, select the desired activity and click on it.
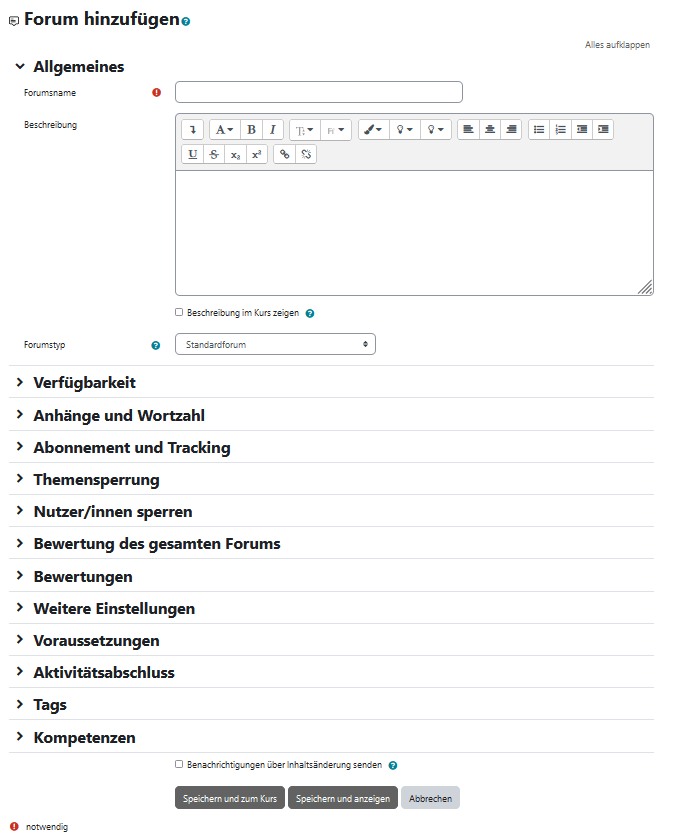
Under General, you first set the Name and optionally the Description for all activities—here, the Forum Name and a Description. If you wish, the description can be displayed on the course page by checking the Display Description on Course Page option.
Under Forum Type, you can choose the type of forum. If you want a standard forum where participants can interact, leave the setting as Standard Forum.
In the additional form fields, you can specify various forum-specific options, such as Attachments and Subscription and Grading Options.
The Additional Settings and Conditions sections are found in all activities and resources. Here, you can set under Availability whether the activity is already available to participants or still Hidden. If you are working with Groups, you can make the appropriate settings here.
If the activity should be tied to specific Conditions, such as access only at certain times, you can set these criteria under Conditions → Add Condition.
Finally, save your changes by clicking Save and return to course or Save and display. The Forum is now created. 
Add a New Topic
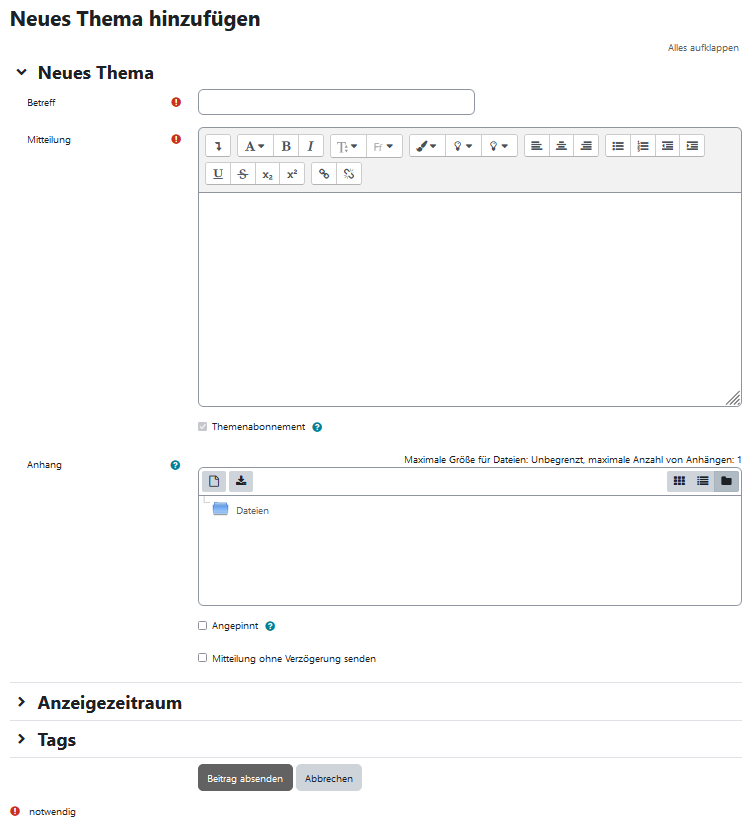
 In the forum, both you and your students can start a new thread by clicking the Add a New Topic button. By clicking Advanced, you can access additional settings.
You can then enter the Subject and the actual Message, which can be formatted using the Editor. Under Subscription, you can decide whether to receive email notifications for replies to your post.
You can also add Attachments. If you want participants to be immediately notified by email about the new topic, check the Send message without delay box. Selecting Pinned will keep the topic always visible at the top. You can also specify a Display Period for the post.
By clicking the Post to Forum button, you publish your post.
Reuse an Activity
 Moodle allows you to reuse all activities and resources in the upcoming semester without needing to recreate the content from scratch. The process is demonstrated here using the Quiz activity as an example.
Backup and Restore
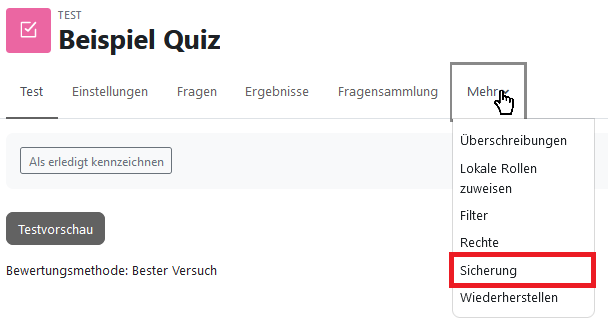
In the quiz, click on More → Backup in the central menu bar.
On the following pages, you can choose which settings you want to restore. Elements you don’t need (e.g., Competencies) can be removed by unchecking the boxes.
Give the backup file a clear name with the extension .mbz. 
By clicking Perform Backup, your quiz will be saved. 
To restore the quiz, click Continue or go to More → Restore in the central menu bar within the quiz.
Under Activity Backup Area, click on Restore next to the desired quiz. 
Next, select the course in which the quiz should be restored. Click Continue to review the settings and finally click Perform Restore.
Import
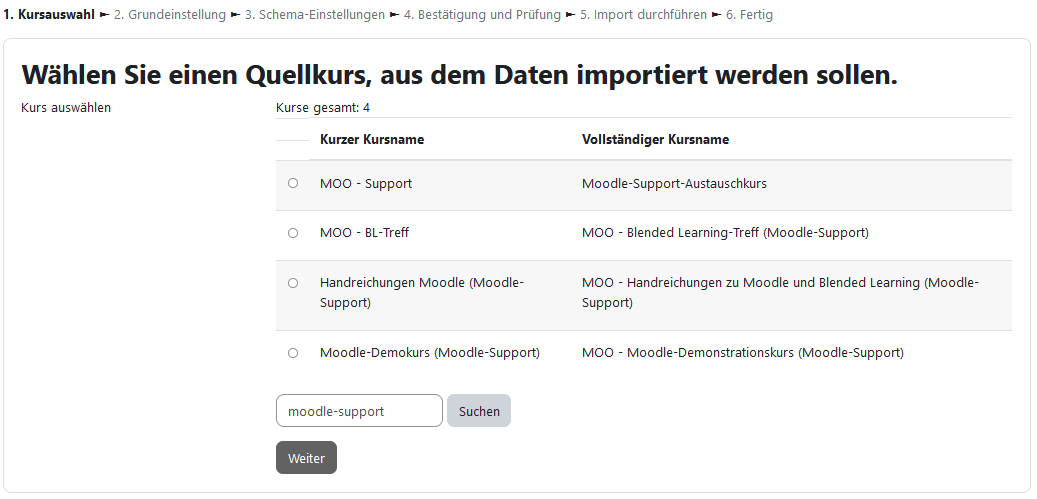
To reuse and „copy“ an activity from one of your existing courses on the current Moodle platform, you can use the Import function.
To reuse and „copy“ an activity from one of your existing courses on the current Moodle platform, you can use the Import function.
On the following pages, you can decide which settings to include (e.g., question bank, competencies), as well as which activities or materials to restore. Uncheck any elements you don’t need, or use the All/None option (Show Type Options) at the top to make bulk selections.
Next, you will see an overview of the elements to be imported. Click Perform Import to start the process. You can make changes using the Back button.
After a successful import, you will receive a green confirmation message. Click Continue to go to the imported/copied course, where you can make further adjustments.
Note: Please be aware that with both functions, no user data will be transferred, and all student grades, submissions, and contributions in the activity will be deleted.
