Inhaltsverzeichnis
Filling the Course Room with Content
 Once you have set up your course, you can start adding content and customizing the course room to your needs. To do this, first switch to the Editing Mode.
The File System in Moodle
Moodle differentiates between various storage locations for your files, which you can access when adding a File.
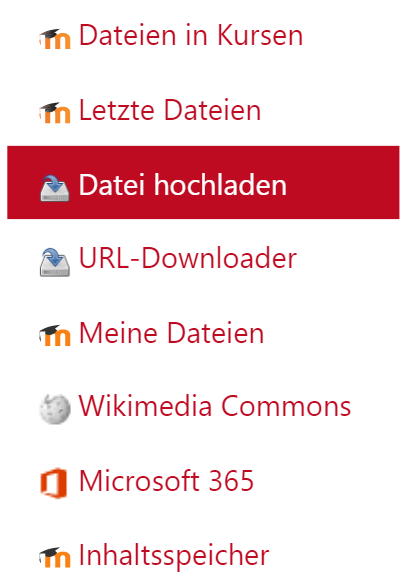
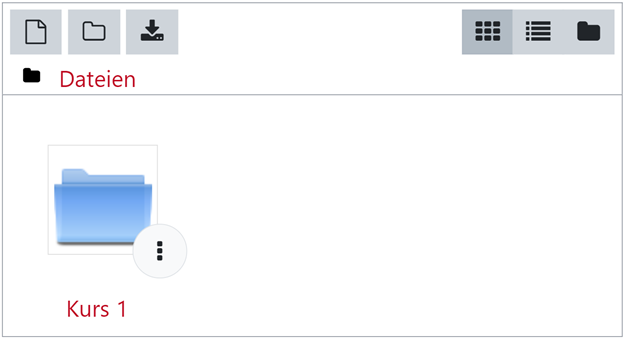
- Files in Courses: This is where all files uploaded directly to a course are stored. These files are organized into folders named after the respective course under Files in Courses.
- Recent Files: This section displays the last 50 files you have used, regardless of their storage location.
- My Files: This is your personal storage space in Moodle, accessible only by you. Here, you can store files that you want to use in multiple courses. Deleting a file in one course does not remove it from other courses or from the My Files folder.

 It is recommended to first gather all the files you need for your courses in one or more folders under My Files. This will save you the hassle of searching through your computer’s hard drive.
To quickly access your files, you can add the My Files block to your dashboard.
Click on your name in the top bar and go to My Files, or use the My Files block on the dashboard and click Manage My Files….
To add files, click the ![]() icon. This opens the File Picker window.
Here, you can access multiple file sources, such as your local computer (Upload a File option). Use the
icon. This opens the File Picker window.
Here, you can access multiple file sources, such as your local computer (Upload a File option). Use the Choose File button to browse your hard drive. Confirm the file by clicking Upload this file. Alternatively, drag and drop the desired files into the designated field (![]() ).
).
It’s useful to create directories for different courses in advance (![]() ). Confirm all file uploads by clicking
). Confirm all file uploads by clicking Save changes. When you click on a directory, the uploaded files will be displayed. Using the icon (![]() ) you can access options like rename, download as ZIP file, delete, change path.
) you can access options like rename, download as ZIP file, delete, change path.
Adding Files to the Course Room
You have several options for making files available to your students in the course.
Option 1: Directly Upload One or More Files via Drag & Drop
If you want to upload teaching materials to your course room, you first need to switch to Editing Mode .
The simplest way to upload a script or other files (PDF, PowerPoint, Word, graphic…) to the course room is to use the Drag & Drop method. Open the relevant folder on your computer and drag the file to the desired location in the course.

The file will be uploaded directly and will appear as a resource with the corresponding file icon in the course room.
You can rename the displayed file name later using the pencil icon. You can make further changes using the three-dot icon.

If you upload an image (.jpg, .gif, .bmp, .png), you’ll be asked whether to embed it as a file or display it directly as an image in the course room.
With the Drag & Drop function, you can also upload multiple files at once. Select them in the folder and move them to the desired topic area as described above.
The files will be saved under Recent Files, and you can reuse them when creating other courses.
Option 2: Add Files via „Add an Activity or Resource“ ===
To upload a file, switch to Edit Mode. Click on Add an Activity or Resource:

In Edit Mode, the „Add an Activity or Resource“ button appears at the bottom of each section. Clicking on it will open a window displaying various options in Moodle. You can fill the course room with materials (static content) and let students work collaboratively and communicatively through different activities. Use the info button  to get helpful descriptions.
If you just want to upload a file, such as a script or presentation, you can do so via File. If you want to upload multiple files in a structured way, it’s advisable to create a Folder.
Adding a File
 First, enter a name for the file. The name will be displayed in the course room. Optionally, you can also enter a description.
- To display this description in the course, activate the corresponding checkbox.
- Drag and drop the desired file into the Select files field.
- Under Display, you have several options, such as displaying the file as a popup window.

- If you don’t want the file to be available to your course participants yet, set Visibility under Other settings to Hidden from participants.

- Finally, confirm your entries by clicking
Save and return to courseorSave and display.

Adding a Folder
If you want to upload multiple files in a structured way, it’s advisable to create a folder under „Add an Activity or Resource“ in Edit Mode. Under Resources, select the Folder option (![]() ).
).
The steps under General and Other settings match those under Add a File.

Drag and drop the desired files (including ZIP files) into the Select files field under Content. You can add subfolders by clicking on the Create folder icon (![]() ) Decide under Display folder content whether the folder and individual files should be displayed directly on the course page.
) Decide under Display folder content whether the folder and individual files should be displayed directly on the course page.
Option Display folder content:
- On a separate page + show subfolder expanded: Files are only visible after clicking the folder, which opens a separate page.
- On the course page: Files are visible directly on the course page.
A Faster Way (Upload Multiple Files as a ZIP File)
In Edit Mode, you can also upload a ZIP file via Drag & Drop to the course page.
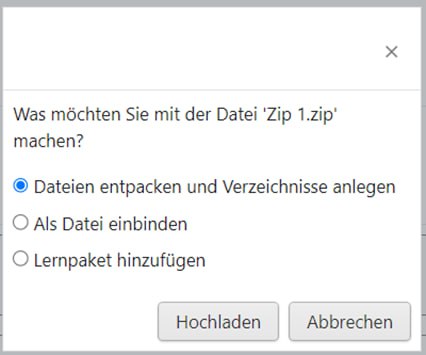

 Note: Please save a folder as a .zip file in Windows, not as .7-zip. The .7-zip format cannot be unpacked in Moodle.
Windows: Send to "ZIP-compressed folder."
In the window that opens, select the option Unpack files and create folders and click Upload. You can then access editing options through the Edit field.
Moodle offers various types ofActivities and Resources that instructors can add to their courses.
Special Forum: Announcements
You can use Moodle to send messages to all students enrolled in a course. The best way to do this is through the „Announcements“ forum, which is already available in every course room. Enrolled students will automatically receive these announcements via email. To post a message to all students in the course, follow these steps:
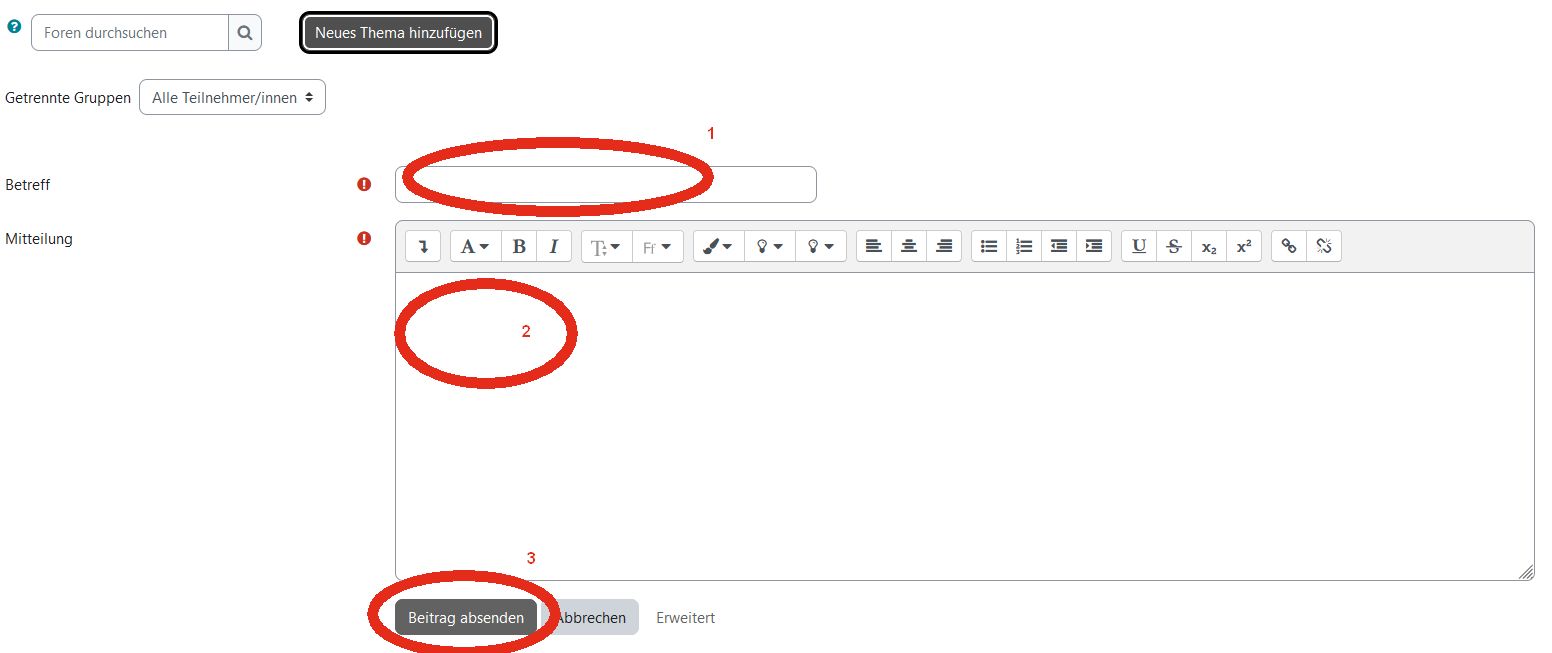
- First, click on the
Announcementsactivity. - Click on the gray button
Add a new topic(red circle).

- In the field next to „Subject,“ write the title of the announcement (red circle 1)

- In the field next to „Message,“ write the text of the announcement (red circle 2).
- Click on the gray button
Post to forum(red circle 3) - The post will be sent to course participants within the next - If you want the announcement to be sent immediately without delay, click on
Advancedand check the boxSend without delay.

The announcement will now appear in the Announcements forum and will also be automatically sent via email to everyone enrolled in the course.
Important note: In the Announcements forum, only you as the course leader have the right to post. Participants only have read access and cannot reply to your posts. If you want your participants to communicate with each other and use a forum, you need to create the Forum activity (Anleitung)