File
Preliminary Steps
- Successful course request
- Change the enrollment key and inform the students
Uploading a Script to the Course Room
After successfully requesting your course room, you can upload your seminar materials.
First, enable editing mode by clicking on the Turn Editing On button at the top right of your course page. Only then will you be able to make changes.
The course interface will change, and you will see symbols for editing, labeling, adding, or moving course content.
Adding One or More Files
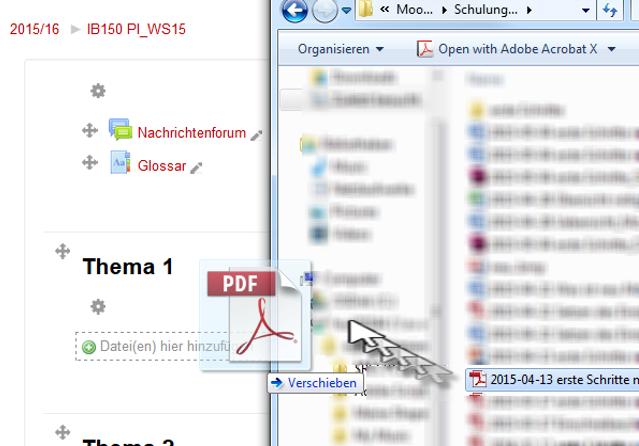
 In editing mode, you can easily add files by dragging and dropping them from a folder on your computer into your course room.
If you want to upload a script or other files (PDF, PowerPoint, Word, etc.), open the relevant folder on your computer and drag the files (in editing mode) to the desired location in your course.
The file will then appear in the course with the corresponding file format icon.

You can rename the displayed name of the file at any time by clicking the pencil icon next to the file name.
Using the drag-and-drop function, you can upload multiple files to the course room at once.
You can also upload zip files using this method.
Note: Please ensure that the file is a Zip file with the „.zip“ extension and not a 7-Zip file with the „.7z“ extension, as Moodle cannot extract these. In Windows: RIGHT-CLICK ON FILES > SEND TO > COMPRESSED (ZIPPED) FOLDER.
Your scripts will then be available for students to download.
 Through the Announcements forum, also known as the bulletin board, you can inform your participants about course updates or newly available materials. Once students are enrolled in the course, they will also receive these notifications via email.